
LeaderOS Discord Bot Features
- Role Synchronization: Synchronizes users roles with your Discord server and matches their Discord username with their in-game username.
- Username Synchronization: Changes the Discord username of users to match their in-game username.
- Quick Setup: Quickly set up our Discord bot by simply inviting and connecting it. No need to host it on any server.
Installation
- Enable the Discord Bot module from the Dashboard > Settings > Modules page.
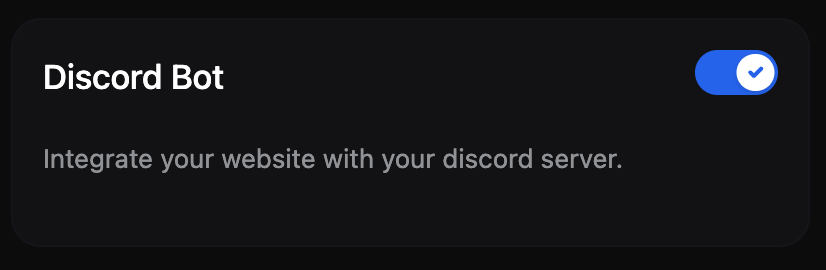
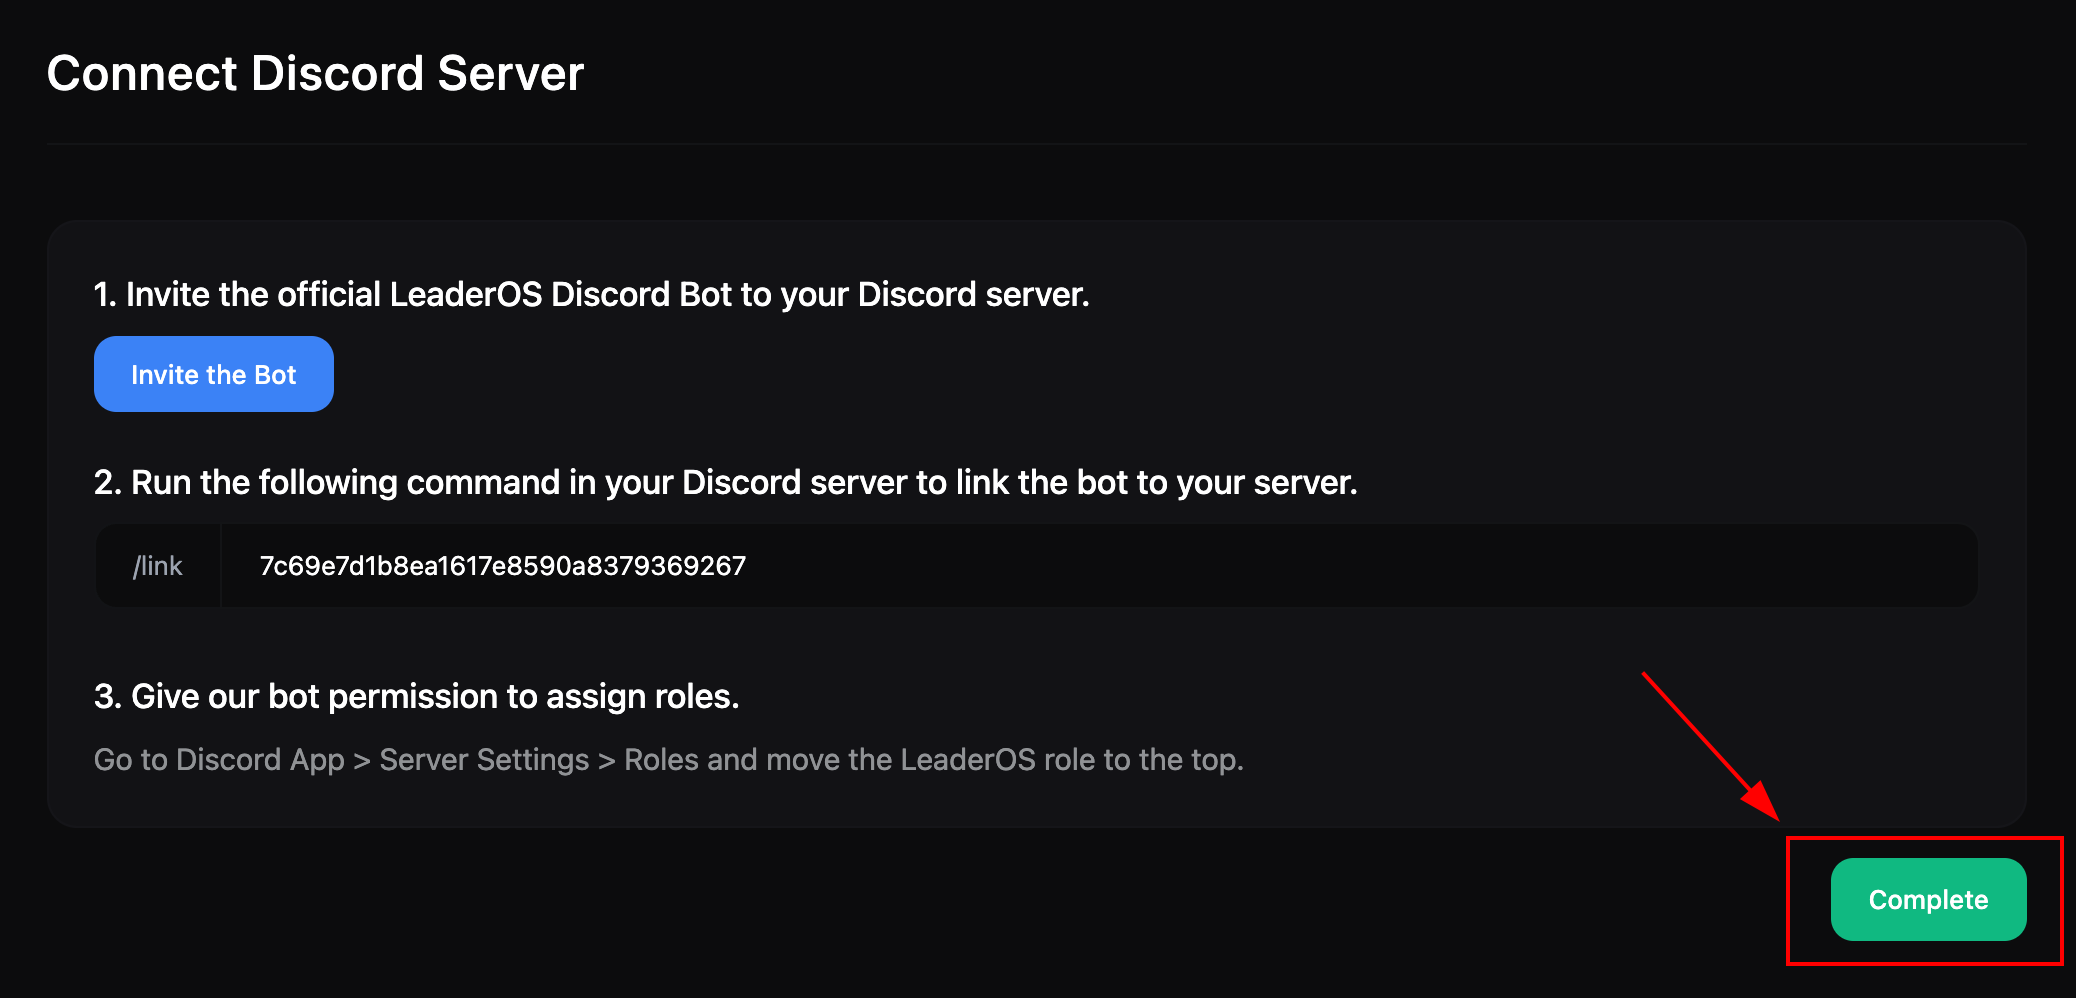
- Click the “Connect Discord Server” button on the Dashboard > Settings > Discord Bot page.
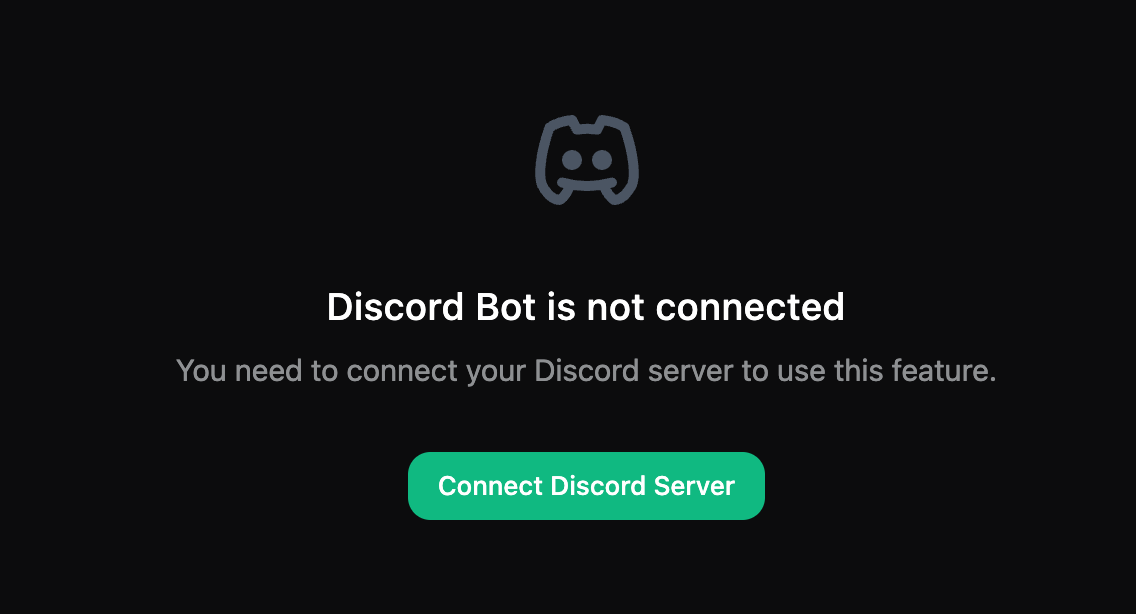
- Complete the steps on the opened page:
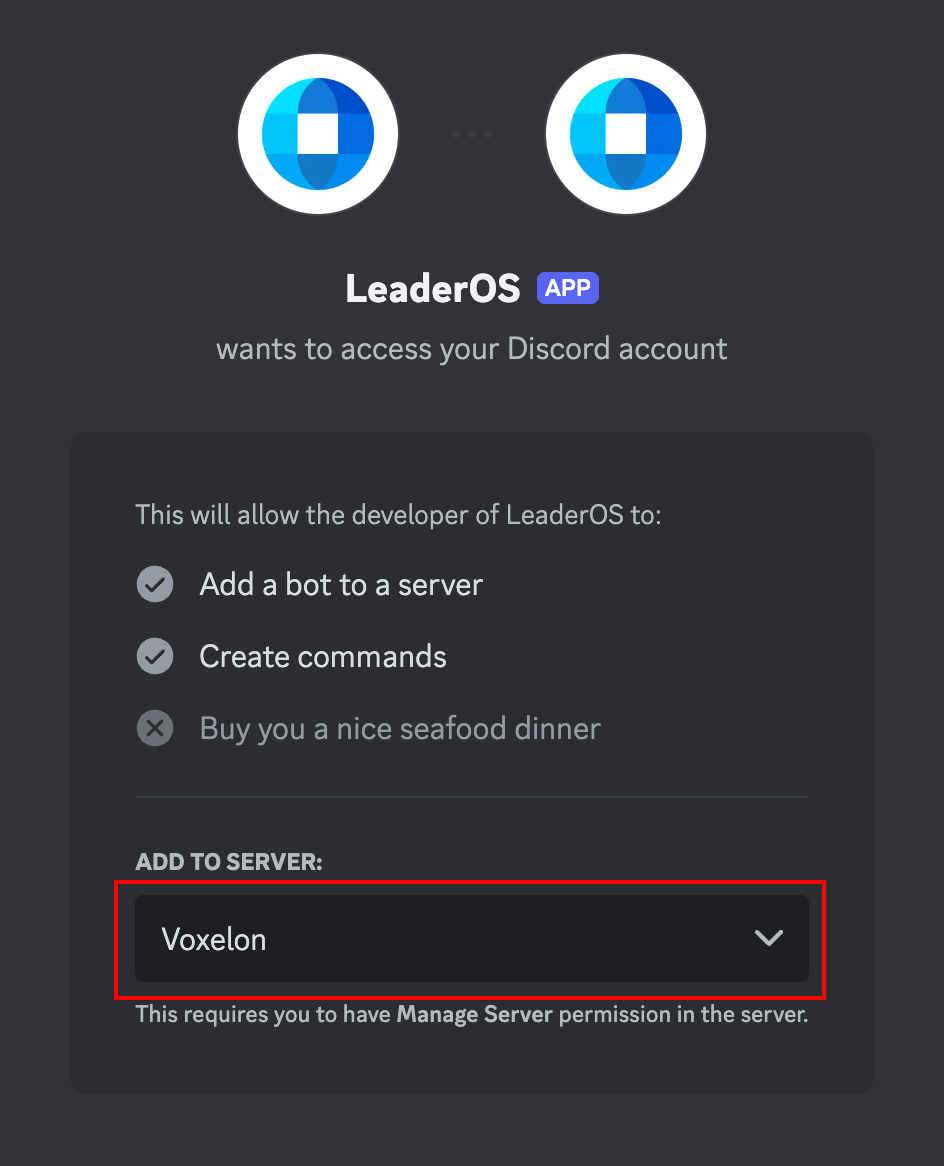
- Step 1: Invite the Discord bot.
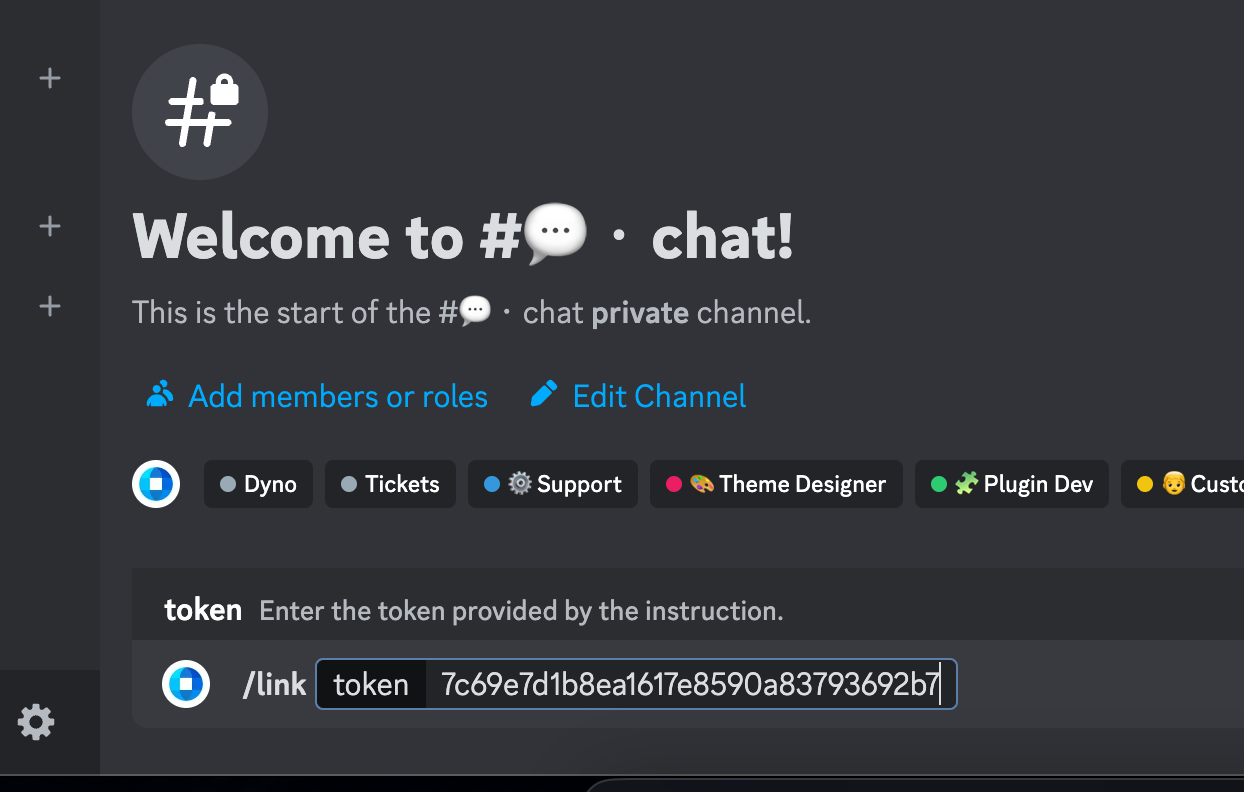
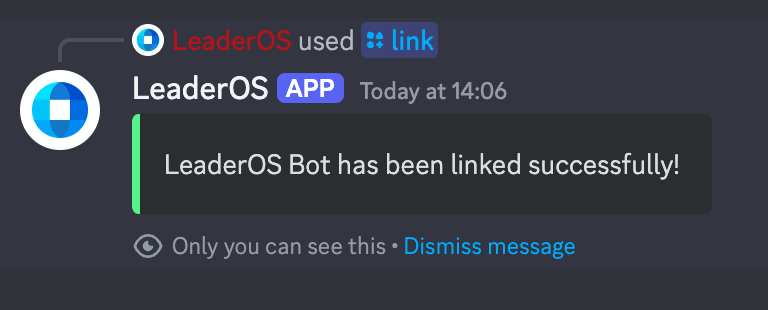
- Step 2: Use the “/link <TOKEN>” command to establish the connection with the invited bot.
- Step 3: Move the bot’s role to the top in the Discord Application > Server Settings > Roles page.

- Step 1: Invite the Discord bot.
- Click the “Complete” button to finish the setup.
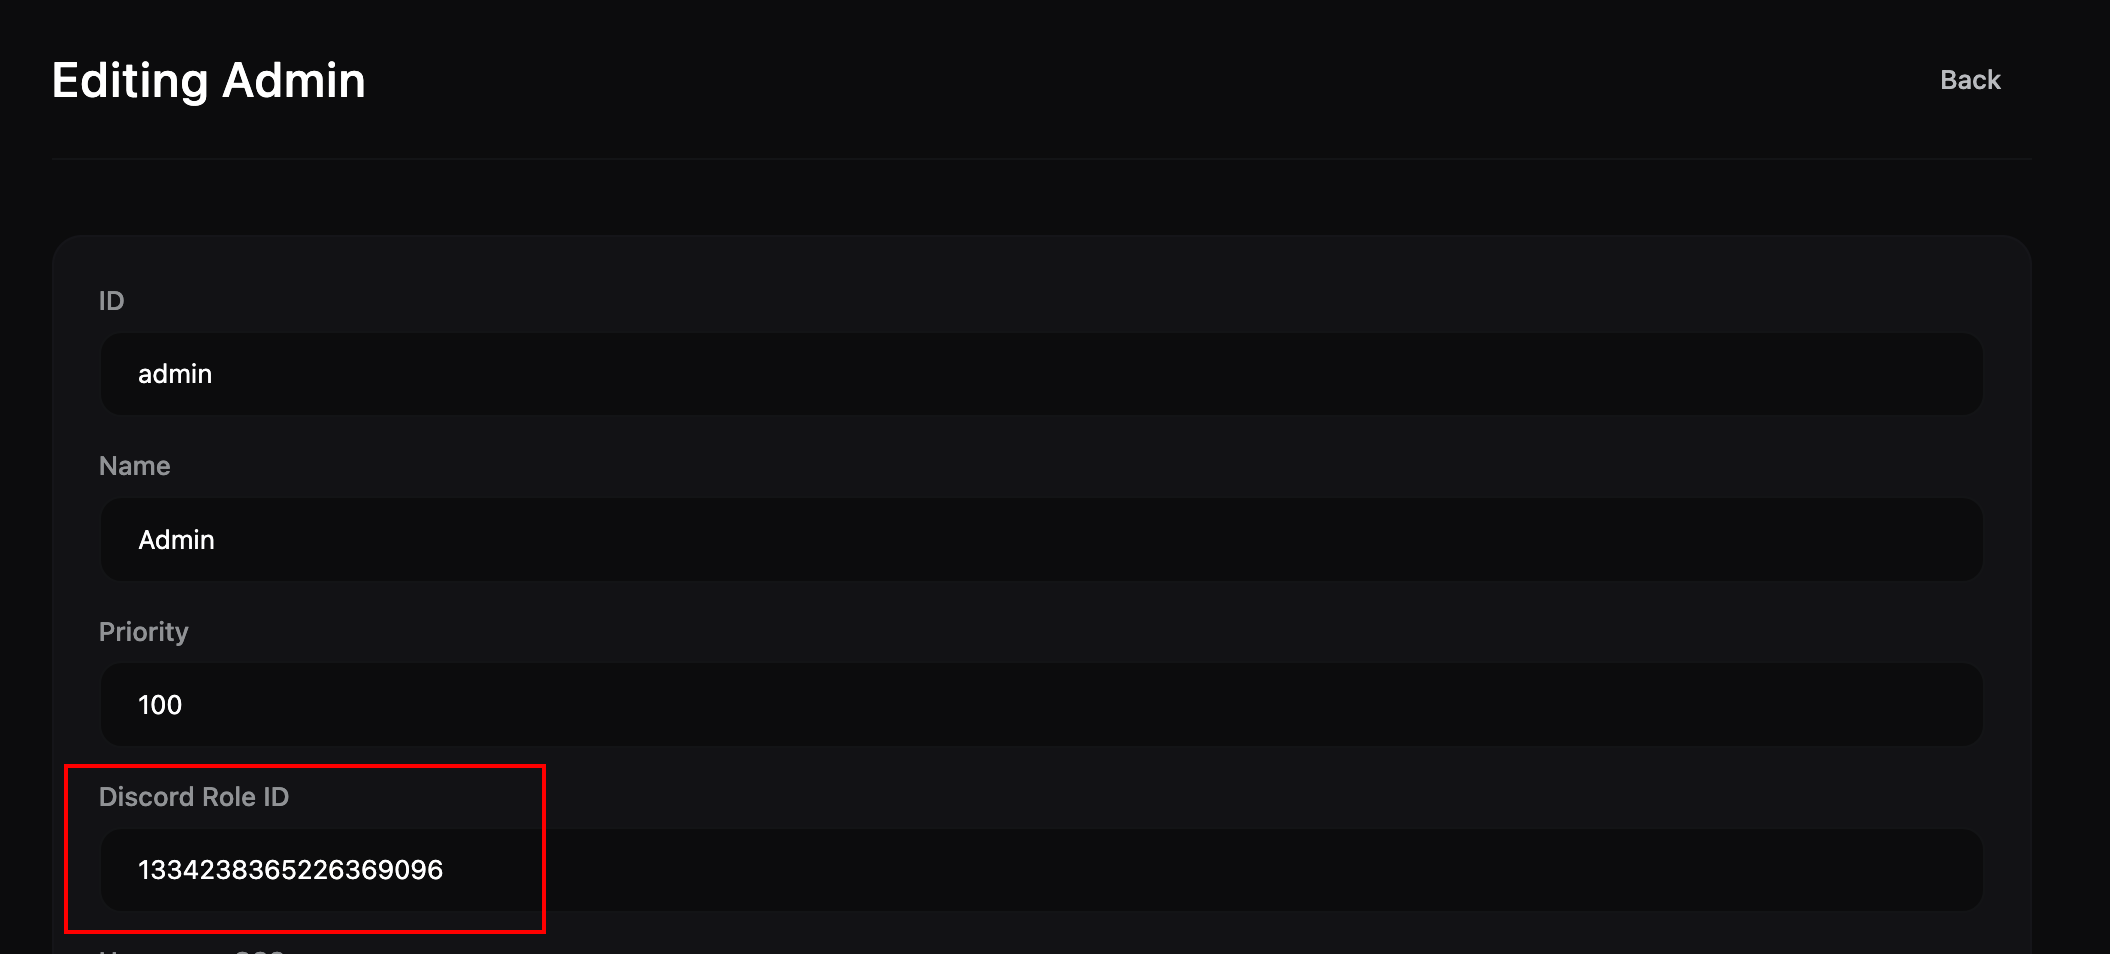
- Edit the website roles to match with Discord from the Dashboard > User Management > Roles page.
Settings
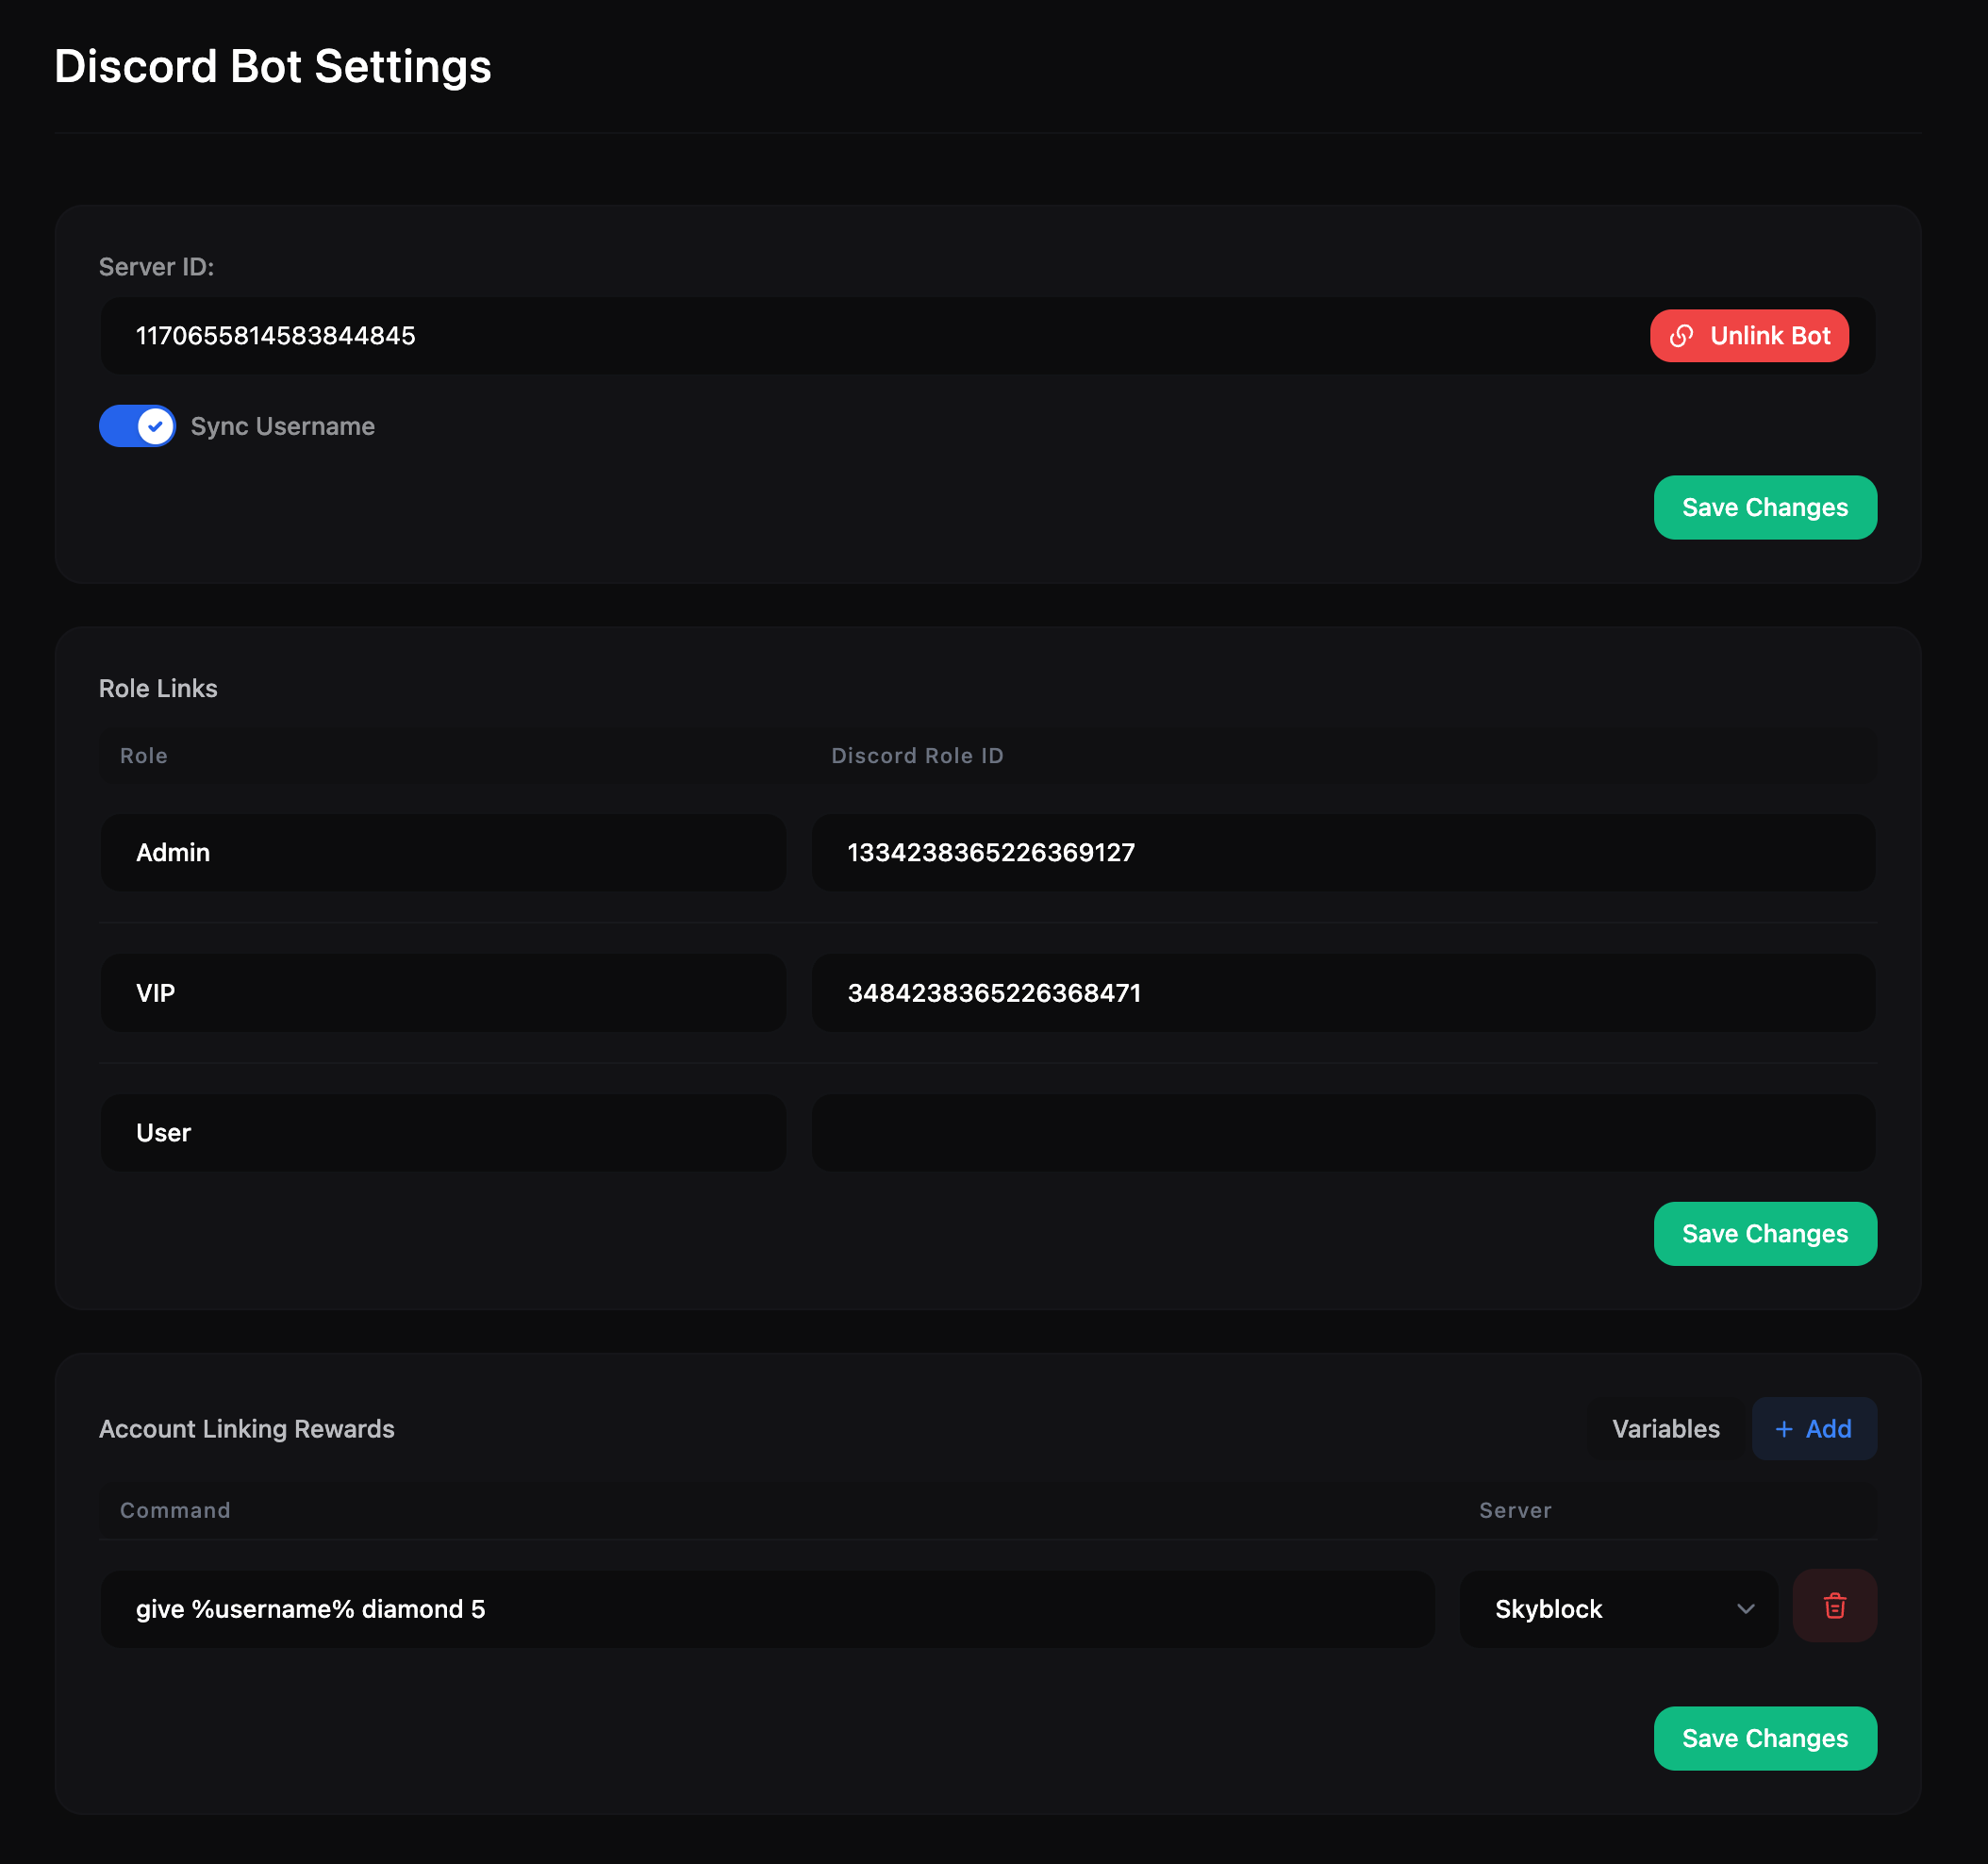
You can configure the Discord Bot settings from the Dashboard > Settings > Discord Bot page.- Server ID: The ID (Guild ID) of the Discord server the bot is connected to. Clicking the “Remove Bot Connection” button will disconnect the bot. You need to unlink the bot to connect it to another server.
- Sync Username: Changes the Discord username of users to match their in-game username.
- Role Links: Map your website roles to Discord roles for synchronization.
- Account Linking Rewards: Commands added here will execute on your server once a user links their Discord account. You can use
%username%as a placeholder for the linked user’s in-game username.
Troubleshooting
- If you encounter the error “An error occurred while connecting to the Discord server.”, reset the API Key from the Dashboard > Settings > API page and try again.