- SMTP Server: Enter the address of your SMTP (Simple Mail Transfer Protocol) server. This is the server responsible for sending your emails.
- SMTP Port: Specify the port number used by your SMTP server. Common values include 25, 587, and 465, depending on the security configuration.
- SMTP Security (SSL/TLS): Choose the security protocol for your SMTP connection. Options include SSL (Secure Sockets Layer) or TLS (Transport Layer Security) to encrypt the communication between your server and the SMTP server.
- SMTP Sender Email Address: Provide the email address from which your system will send emails. This is the address that will appear as the sender of the emails.
- SMTP Username: Enter the username associated with the SMTP server. This is used to authenticate your server with the SMTP server. Usually, this is the same as the email address.
- SMTP Password: Enter the password associated with the SMTP server. This ensures secure access to the SMTP server for sending emails.
- Ensure the accuracy of these settings to enable seamless communication with your SMTP server for effective email delivery.
If you’re looking for a free SMTP service compatible with the provided SMTP settings, here are a few recommendations:
- LeaderOS Web Hosting SMTP Service (Recommended!)
- SendPulse
- Zoho Mail
- Yandex Mail
- Godaddy Email
How can I setup/configure LeaderOS Web Hosting SMTP service?
- Log in to your cPanel.
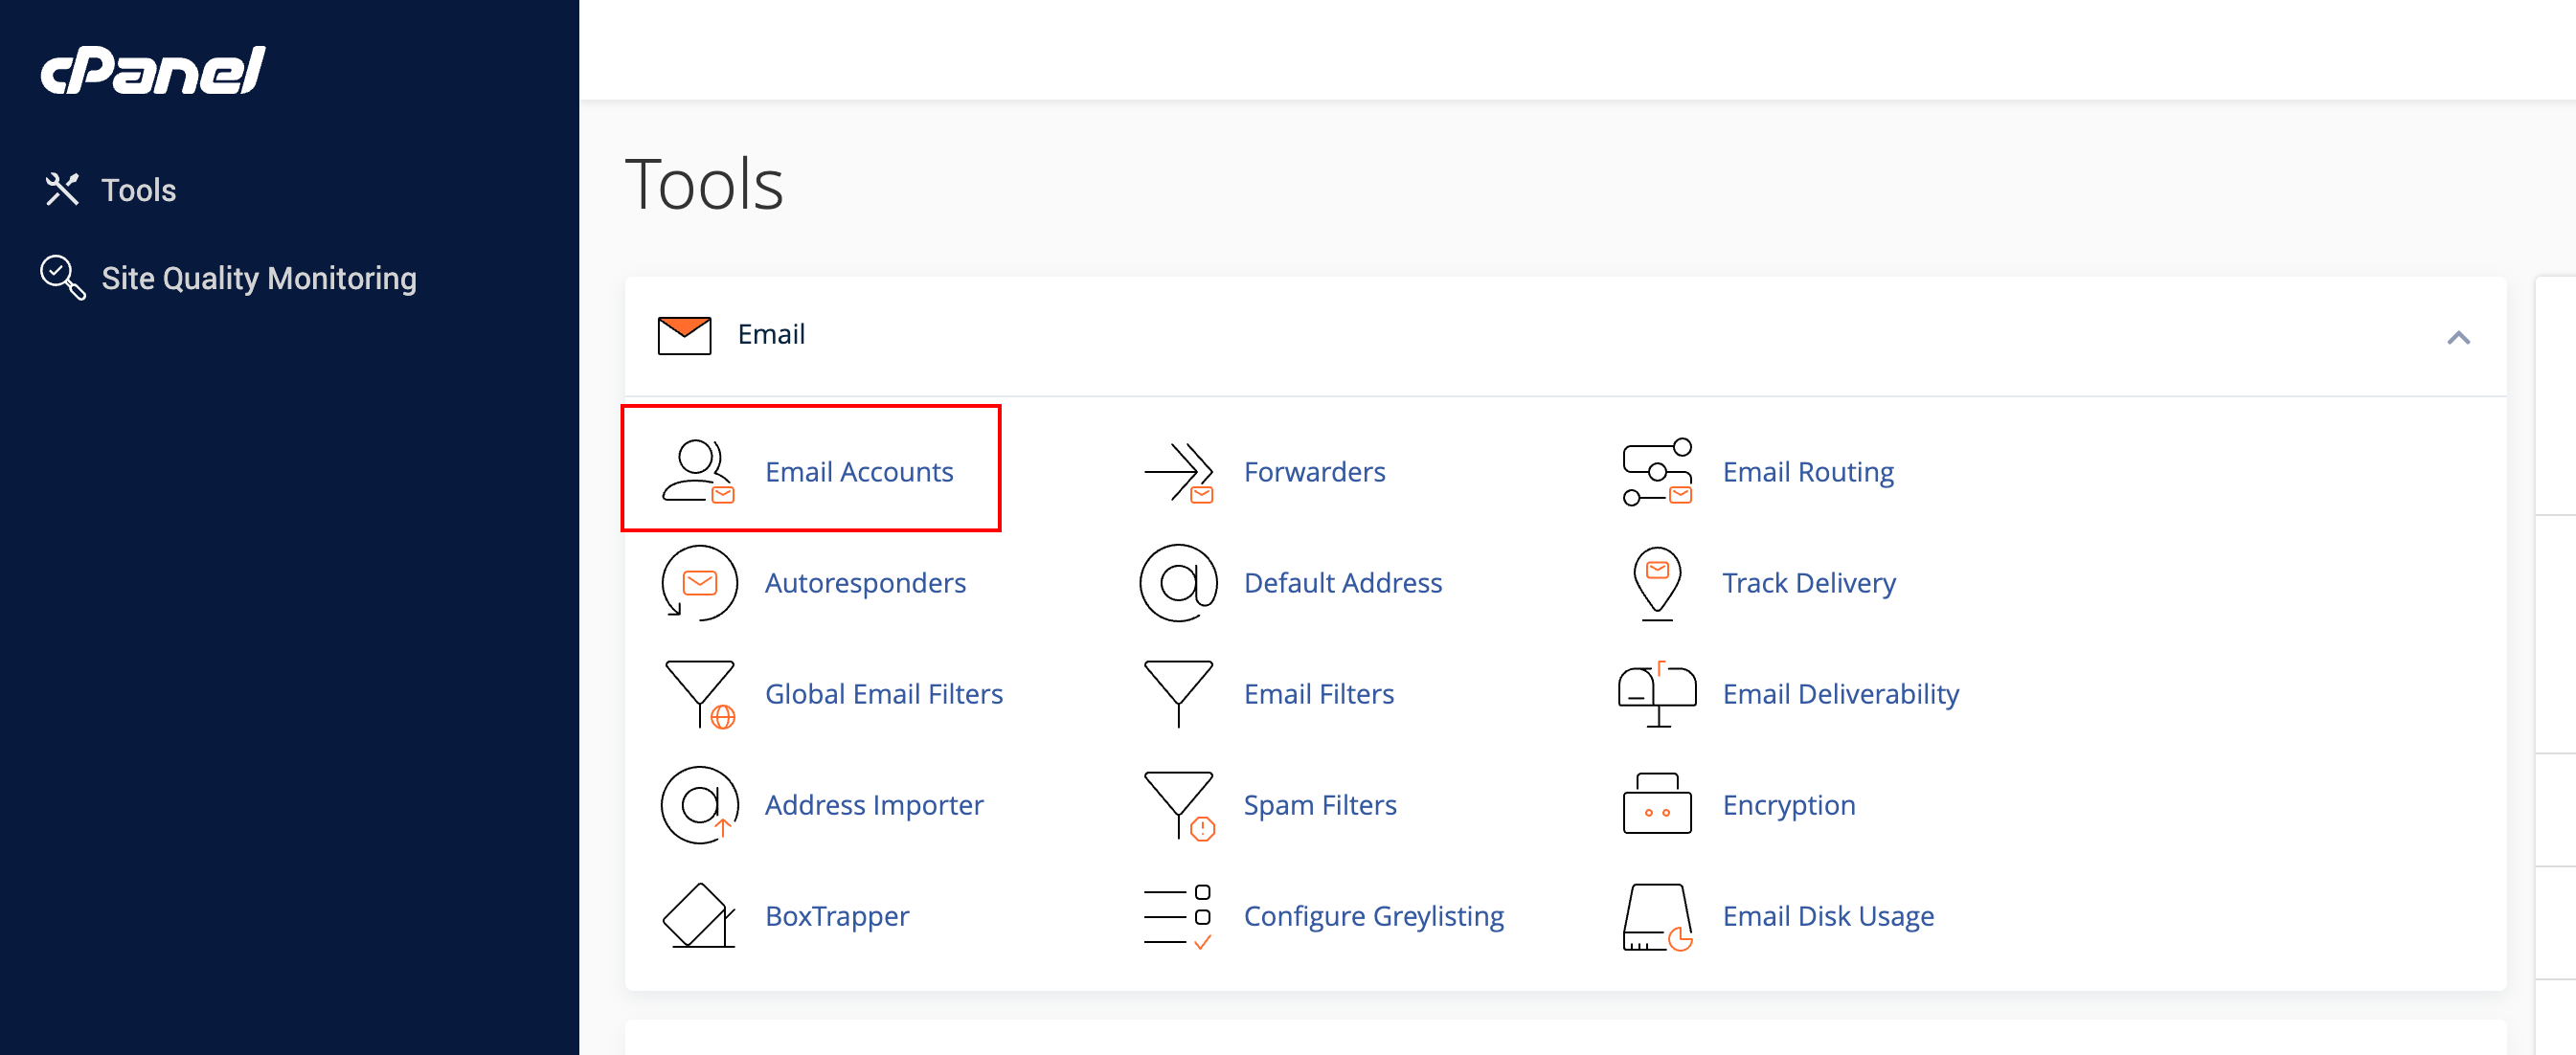
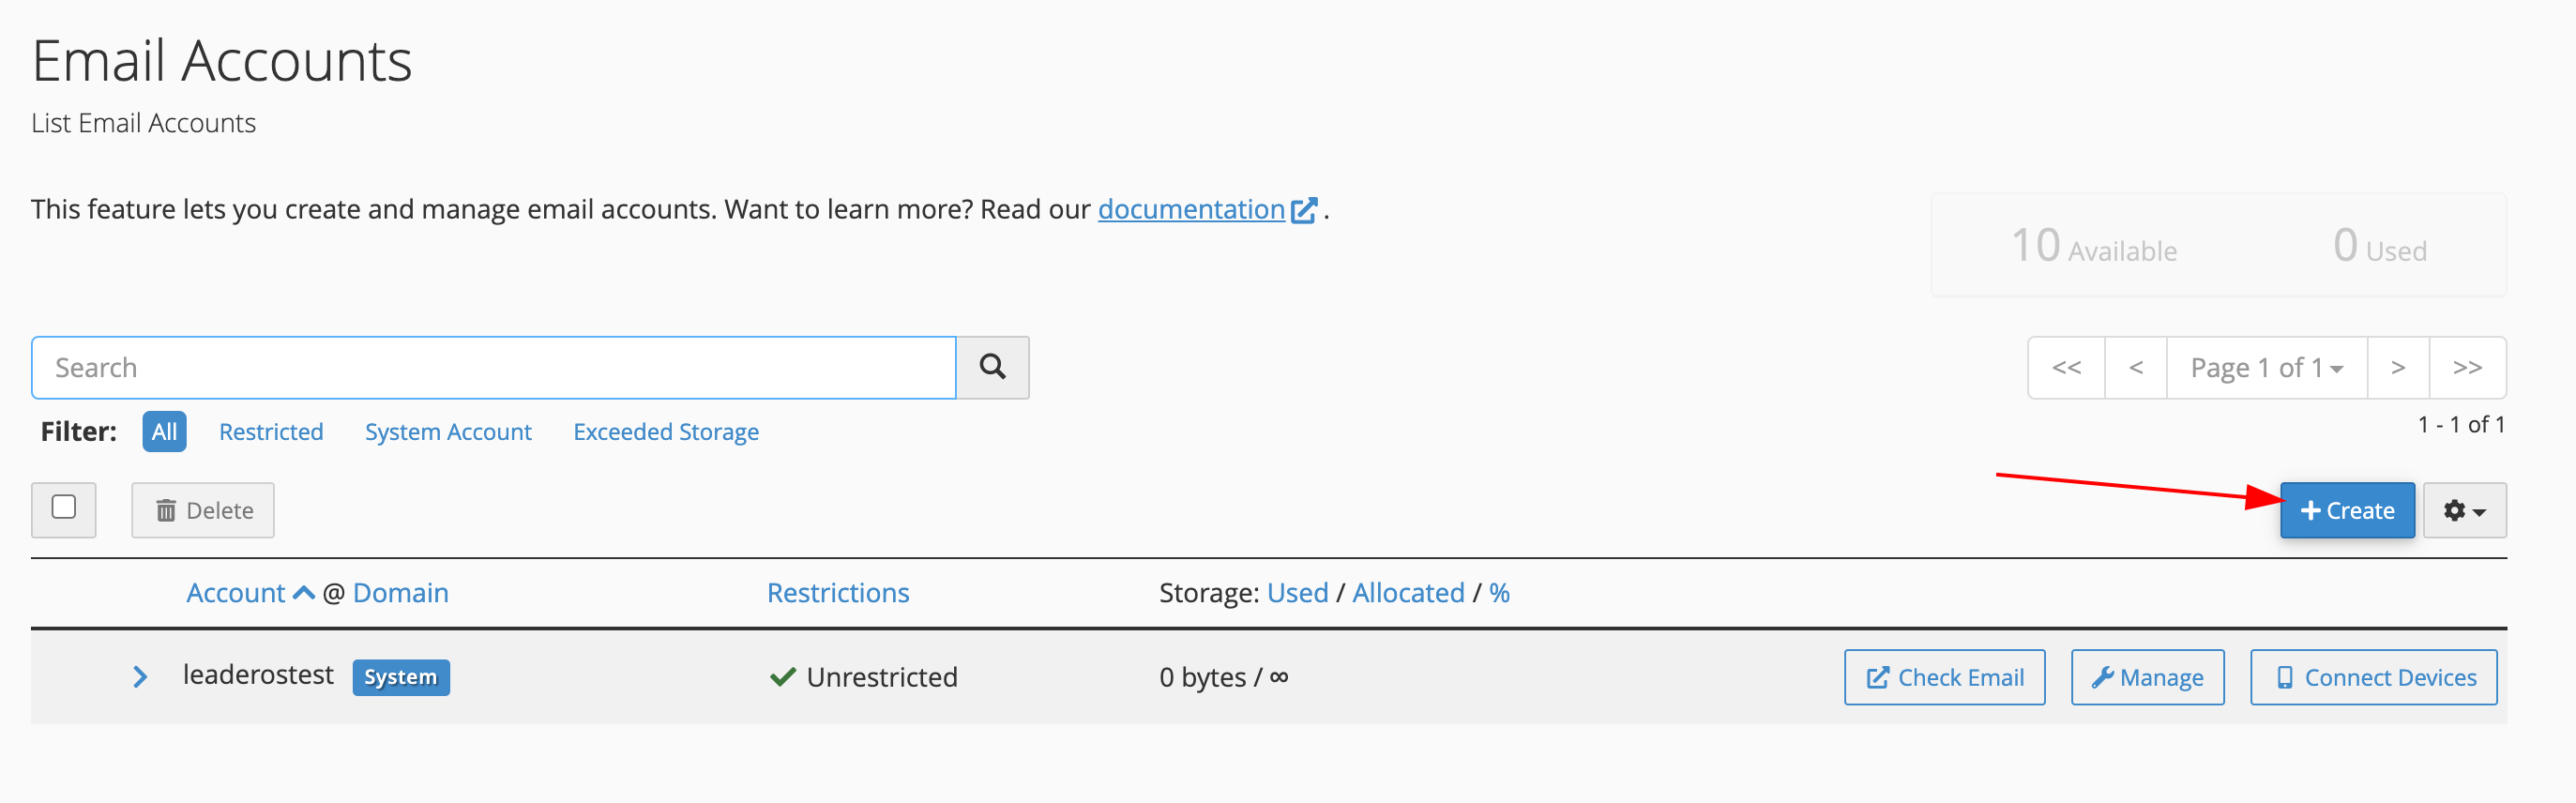
- Go to cPanel > Email > Email Accounts and click on the Create button.
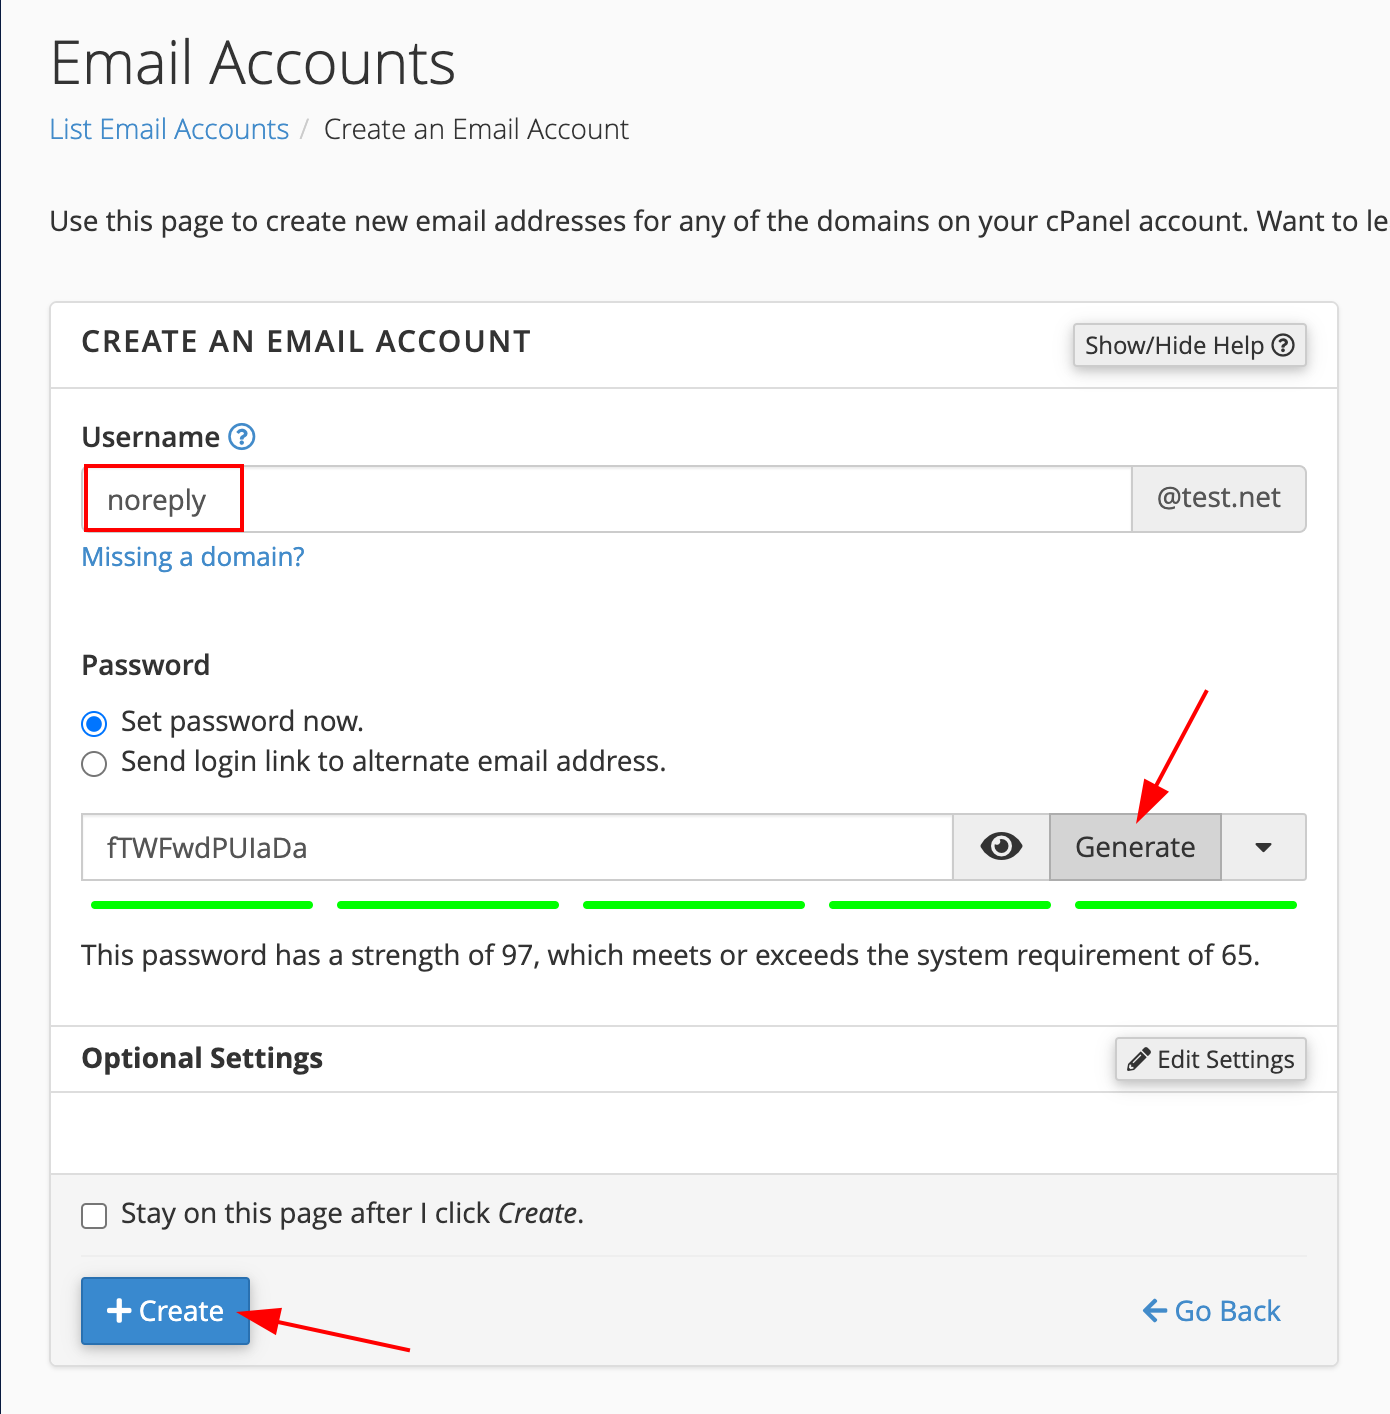
- Create an email account. For example: [email protected]
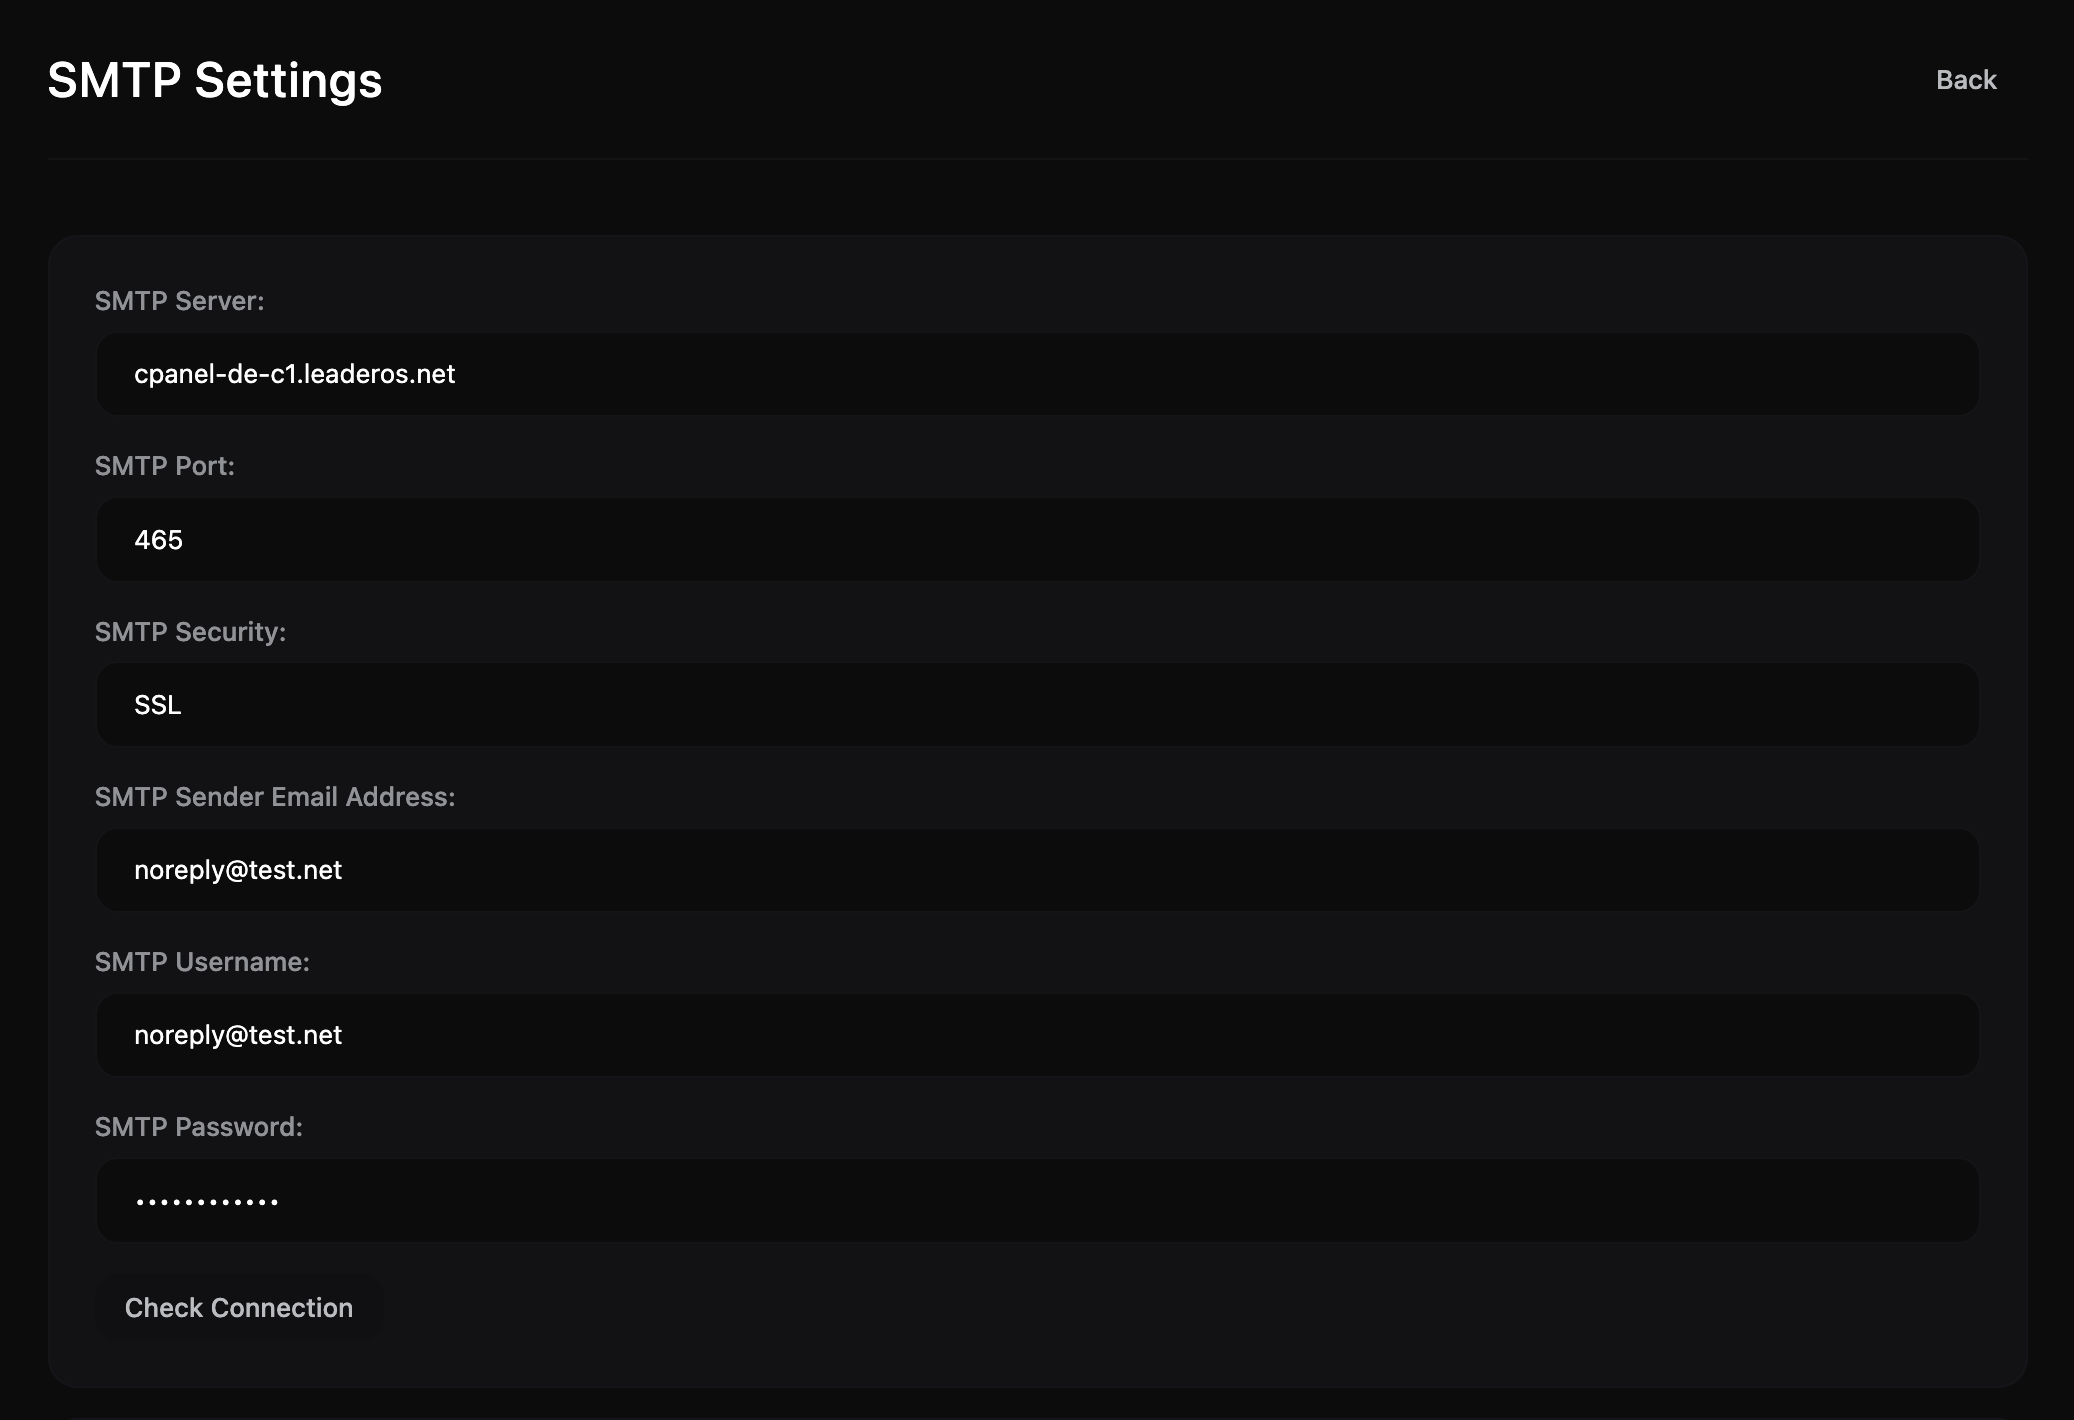
- Go to Dashboard > Settings > SMTP and enter SMTP settings.
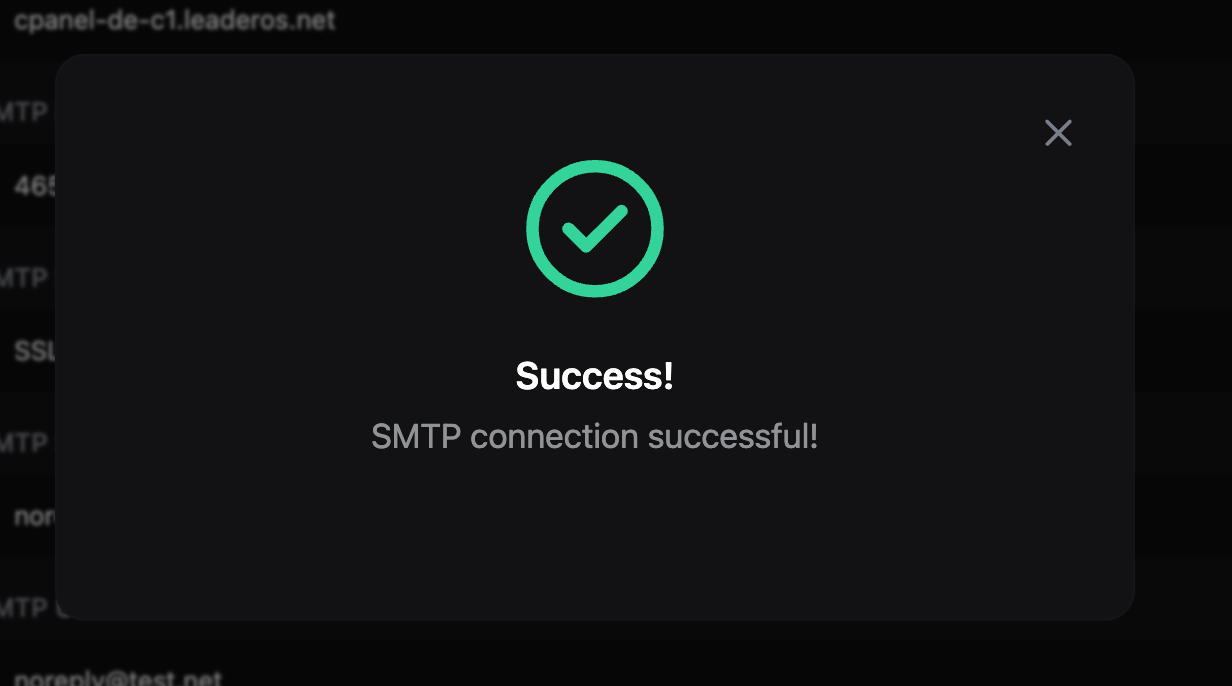
- You can test the connection by clicking on the “Check Connection” button.
LeaderOS Web Hosting SMTP Values:
- SMTP Server: Your cPanel hostname.
(Example cpanel-de-c1.leaderos.net) - SMTP Port:
465 - SMTP Security:
SSL - SMTP Sender Email Address: The Email address you created.
(Example [email protected]) - SMTP Username: The same email as the “Sender Email Address”.
(Example [email protected]) - SMTP Password: The password you set for the email account.
How to add DKIM and SPF records to Cloudflare?
-
Login to your cPanel.
-
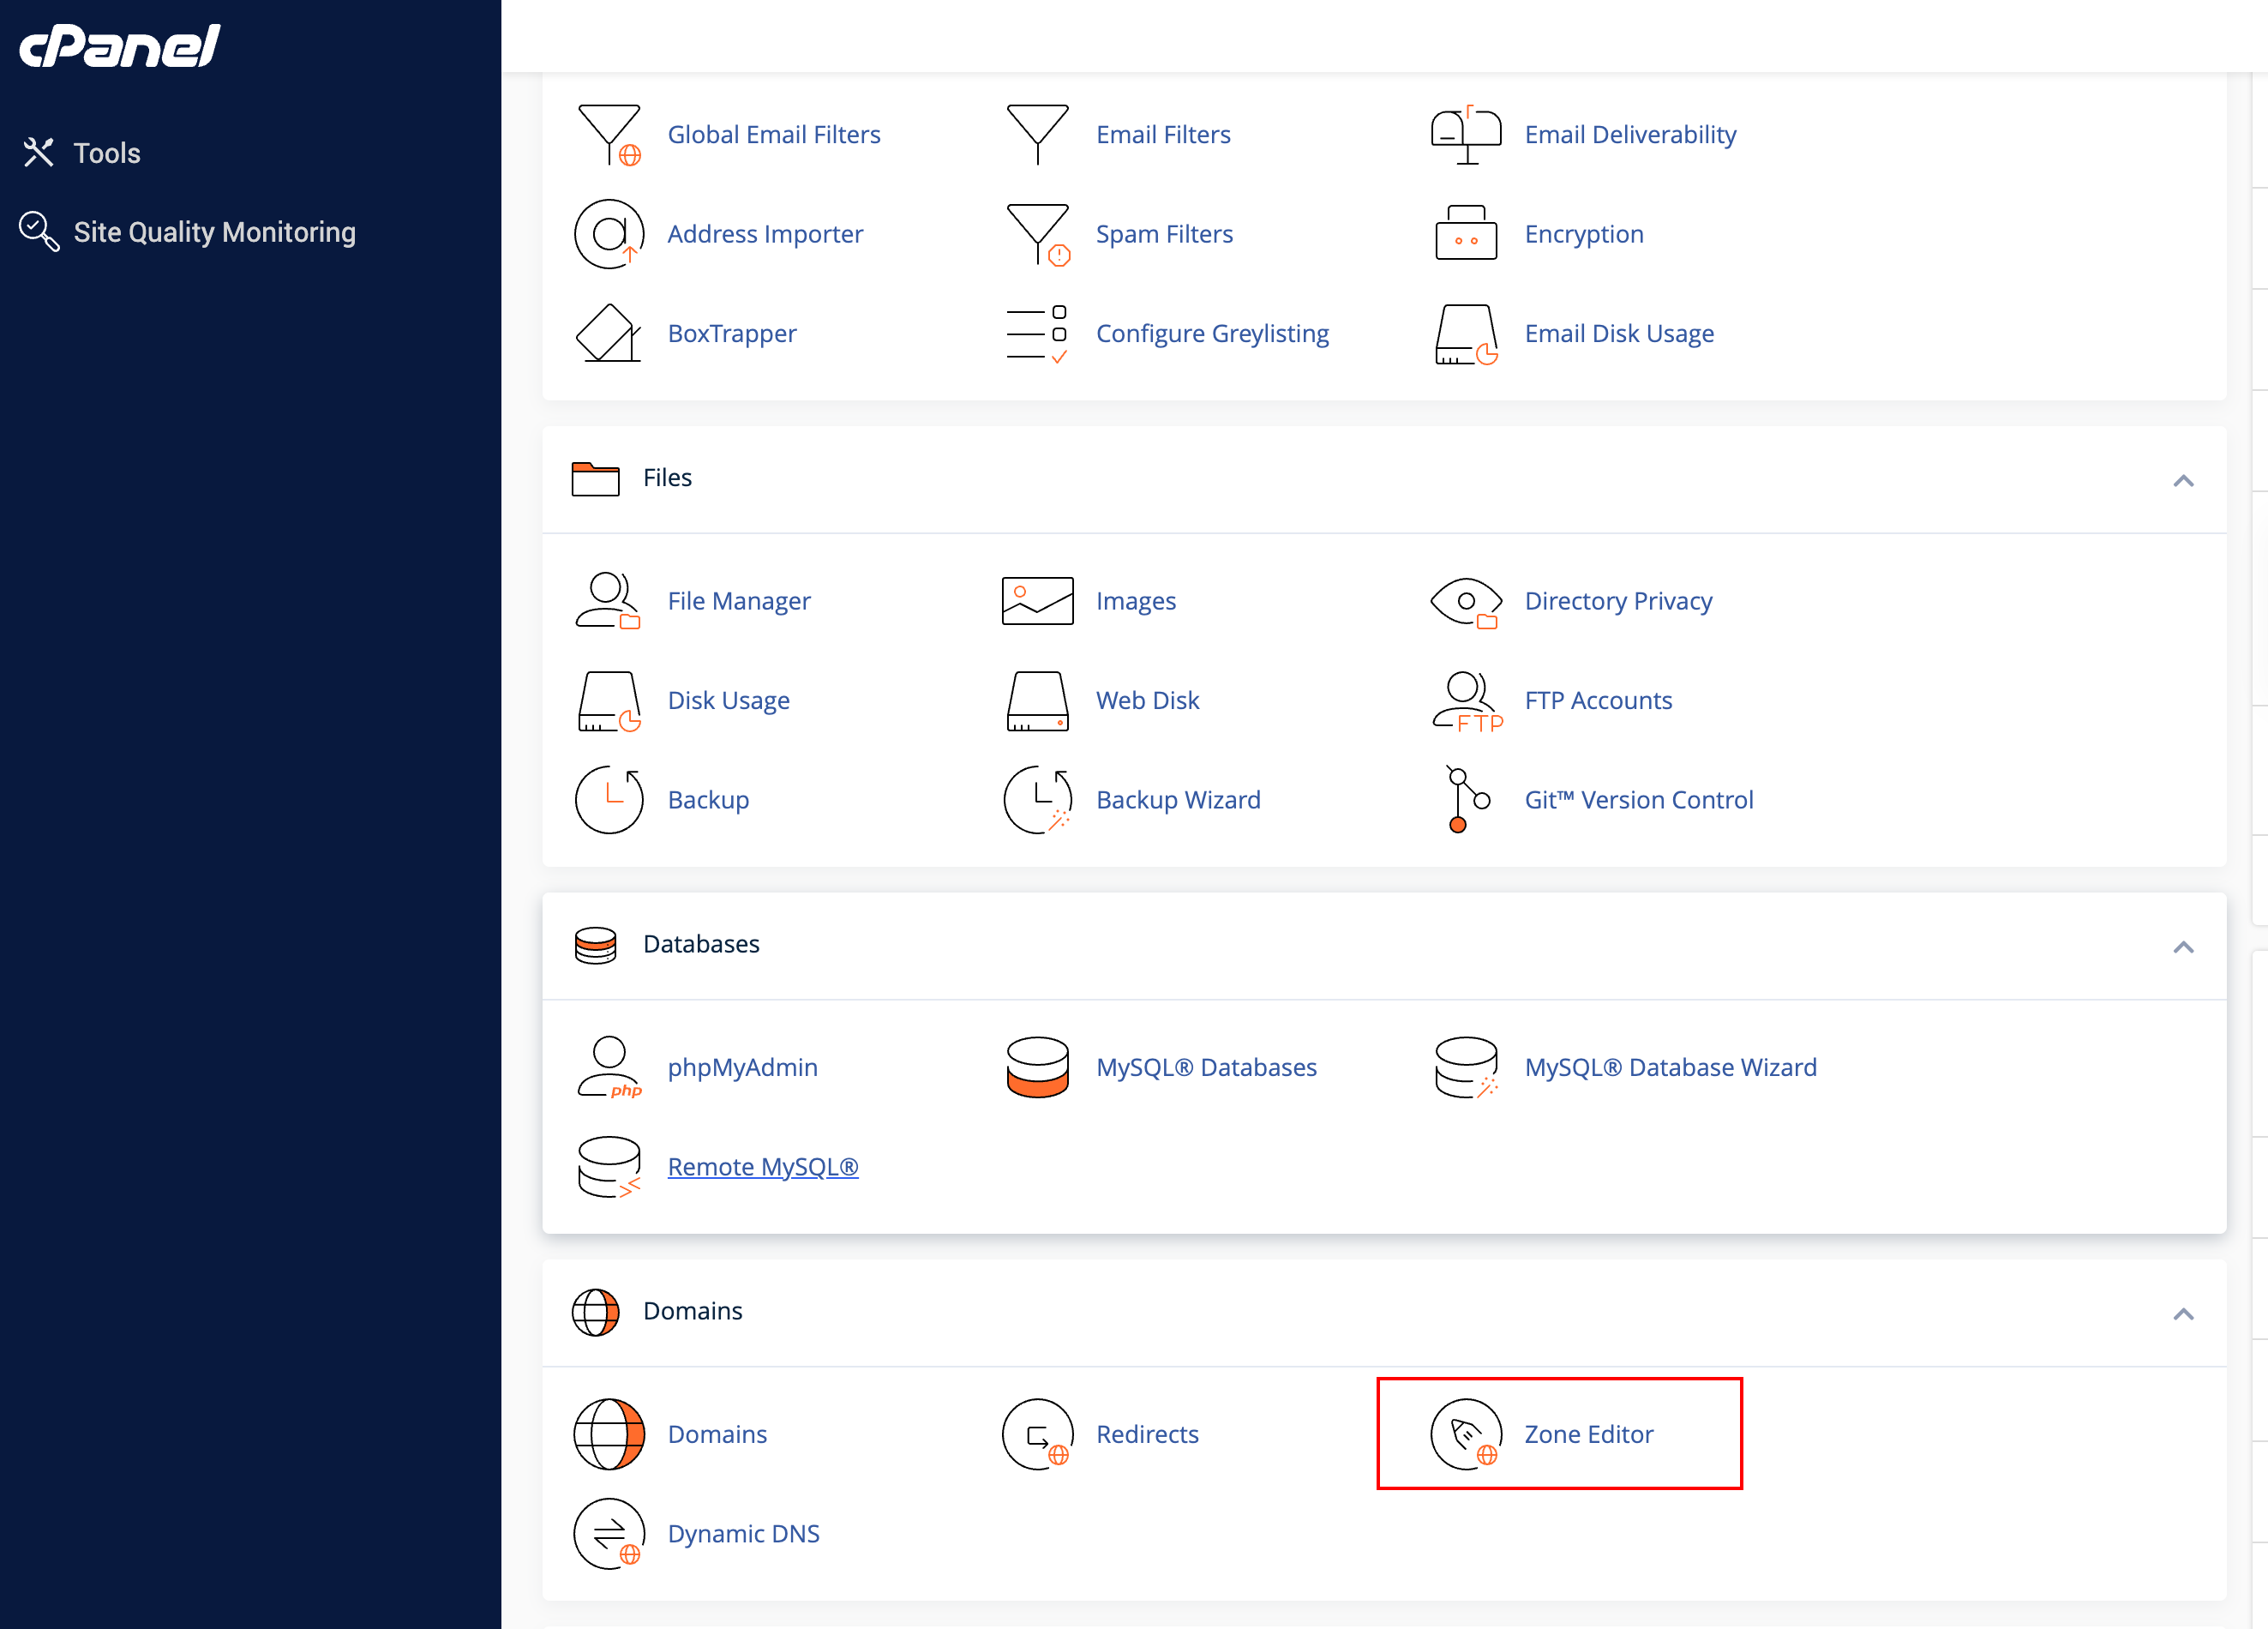
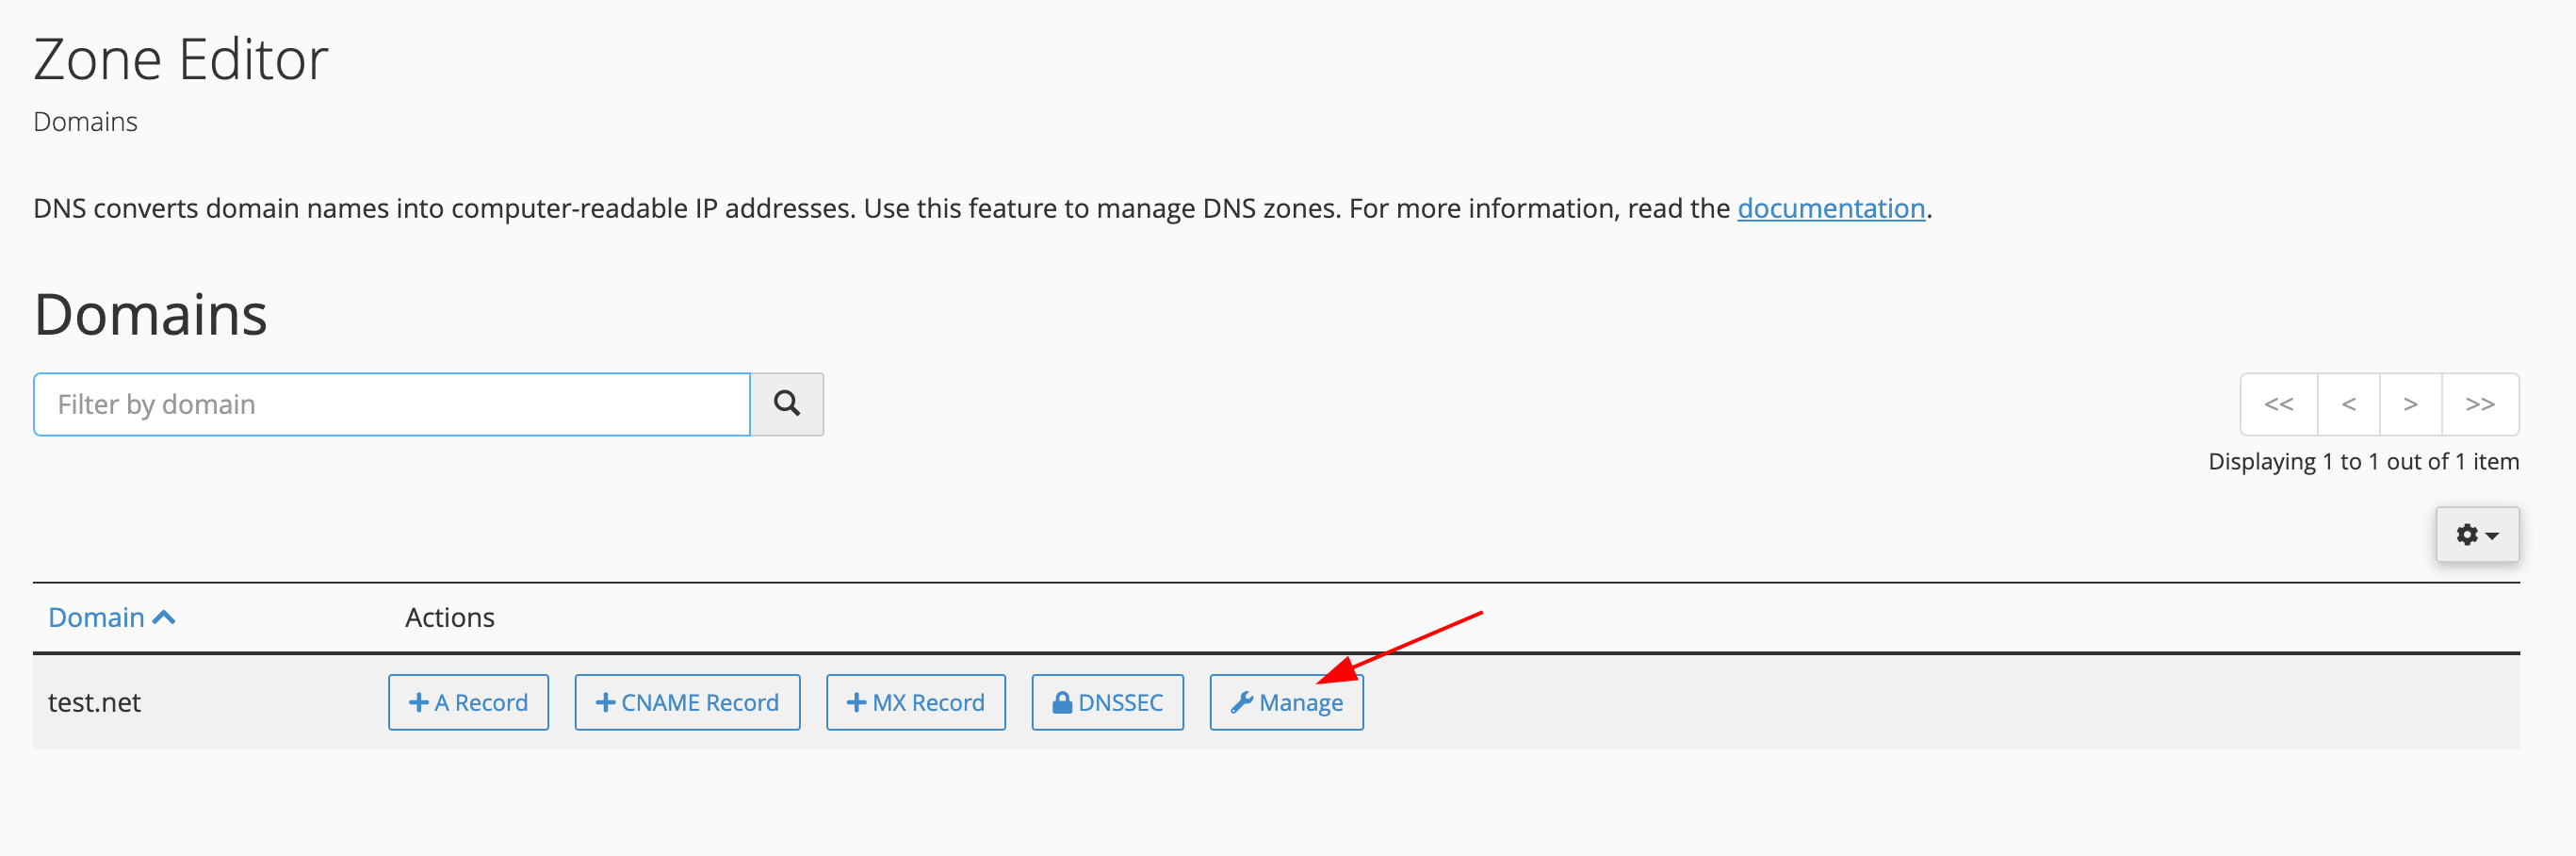
Go to cPanel > Domains > Zone Editor > Manage
-
Find and copy the SPF record. The SPF value starts with “v=spf1”.
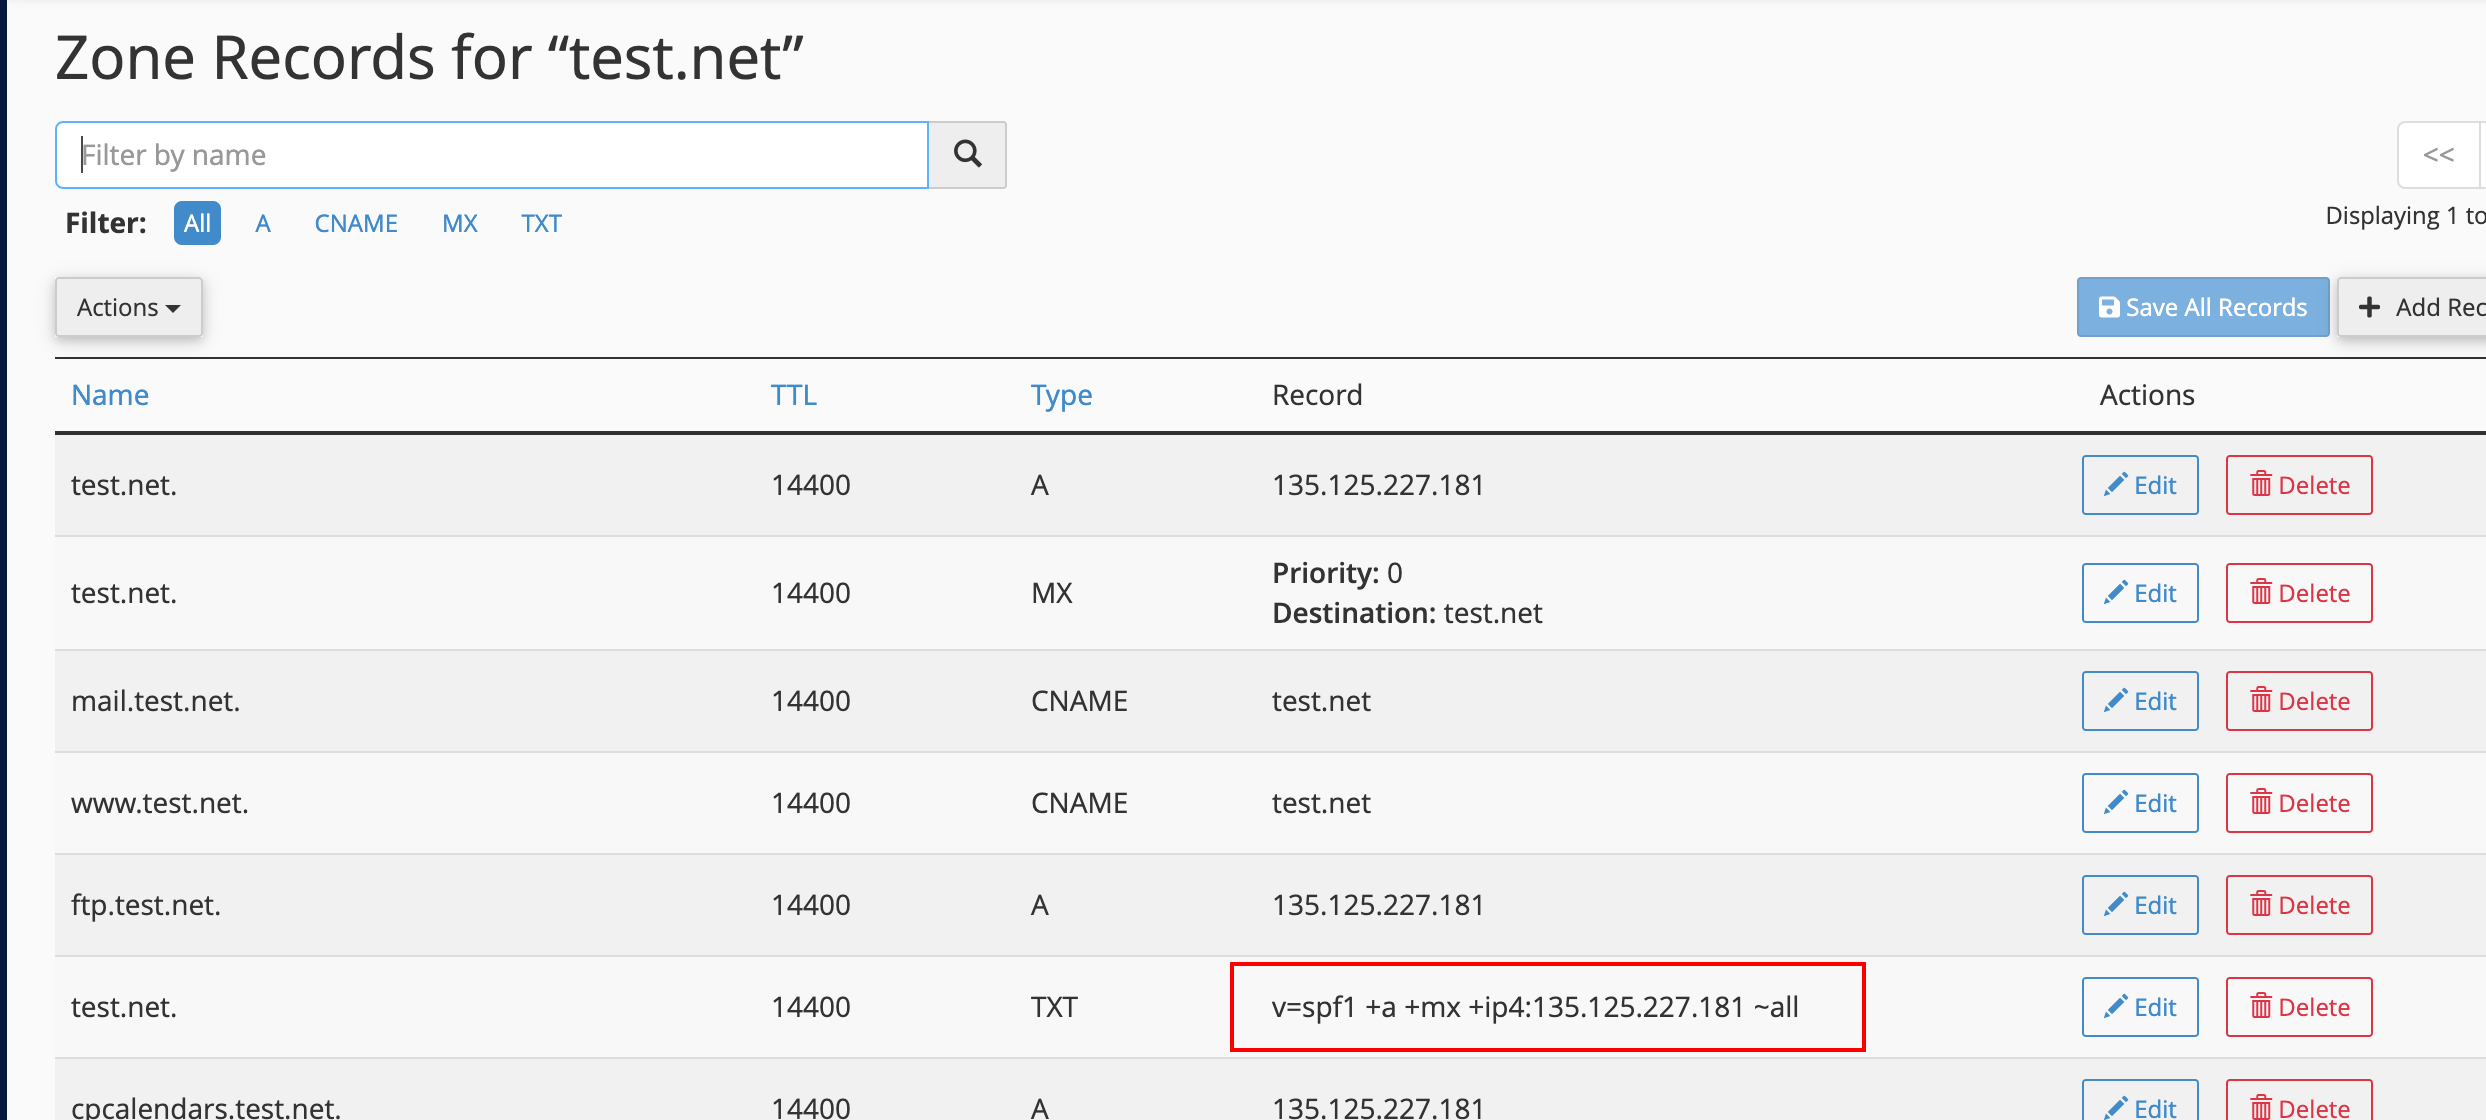
-
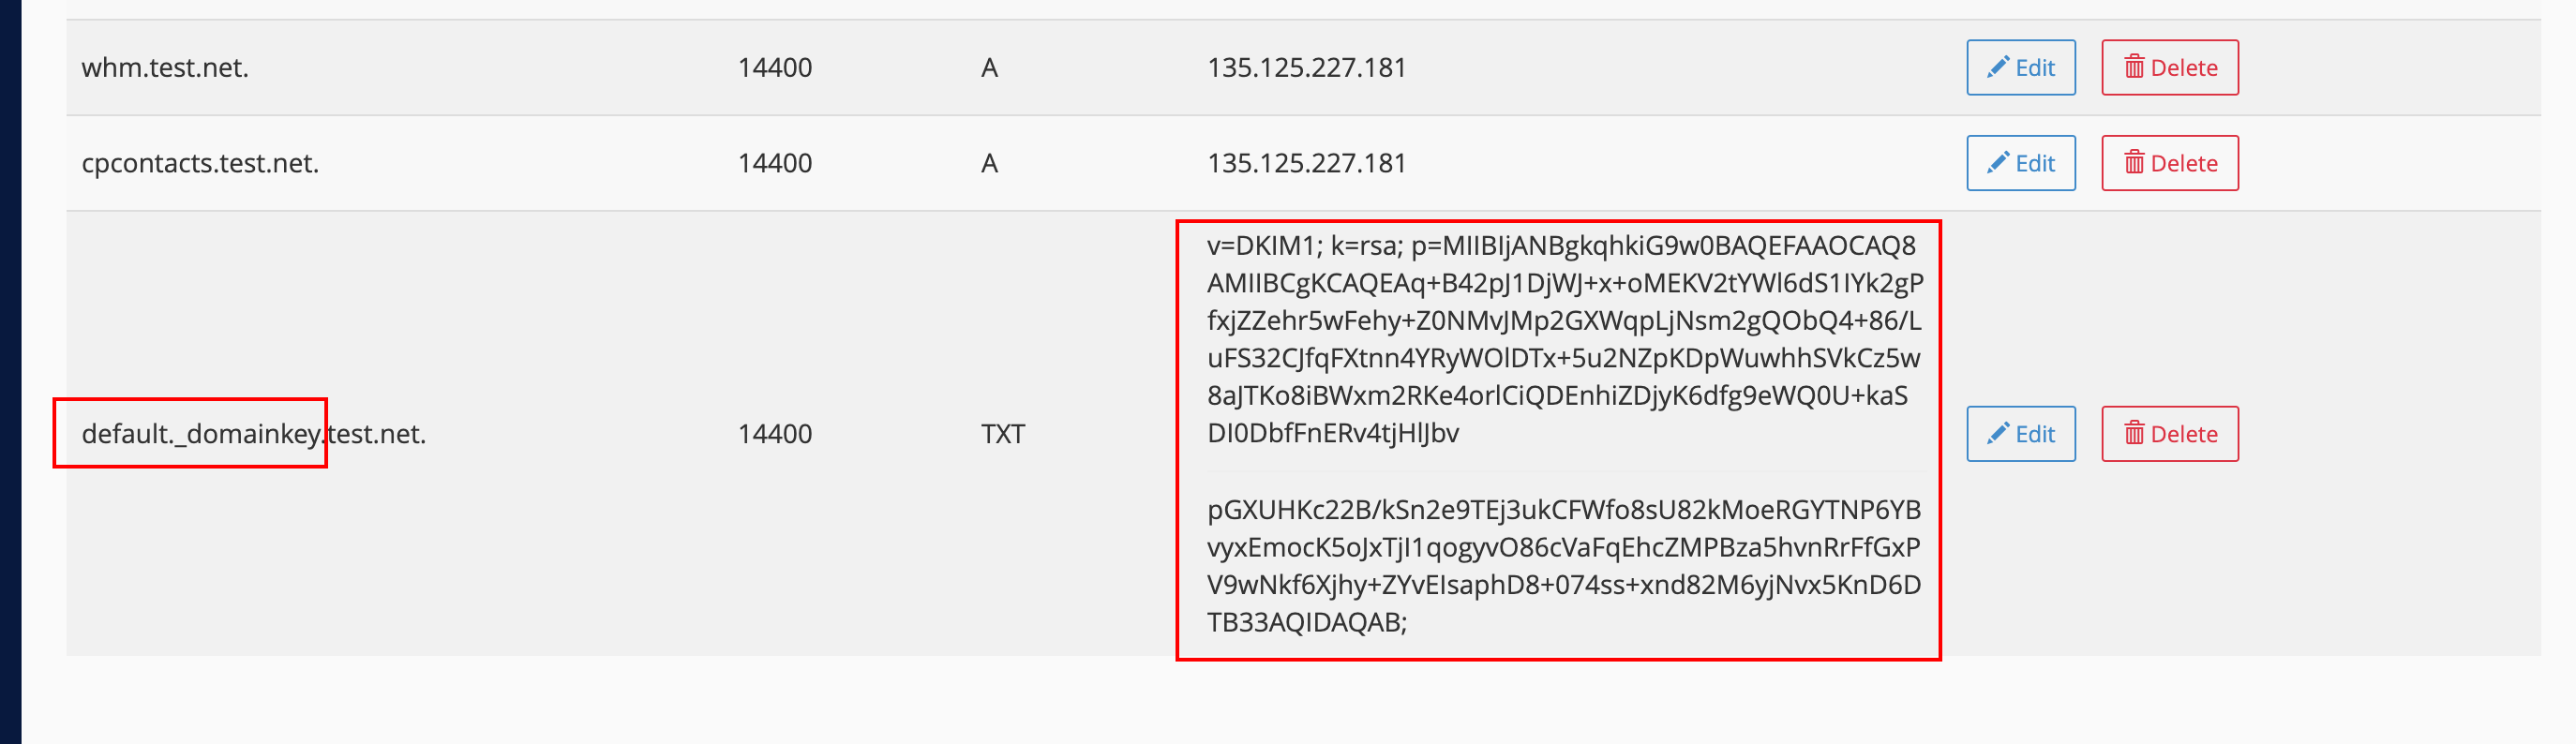
Find and copy the DKIM record. The DKIM value starts with “v=DKIM1;”.
-
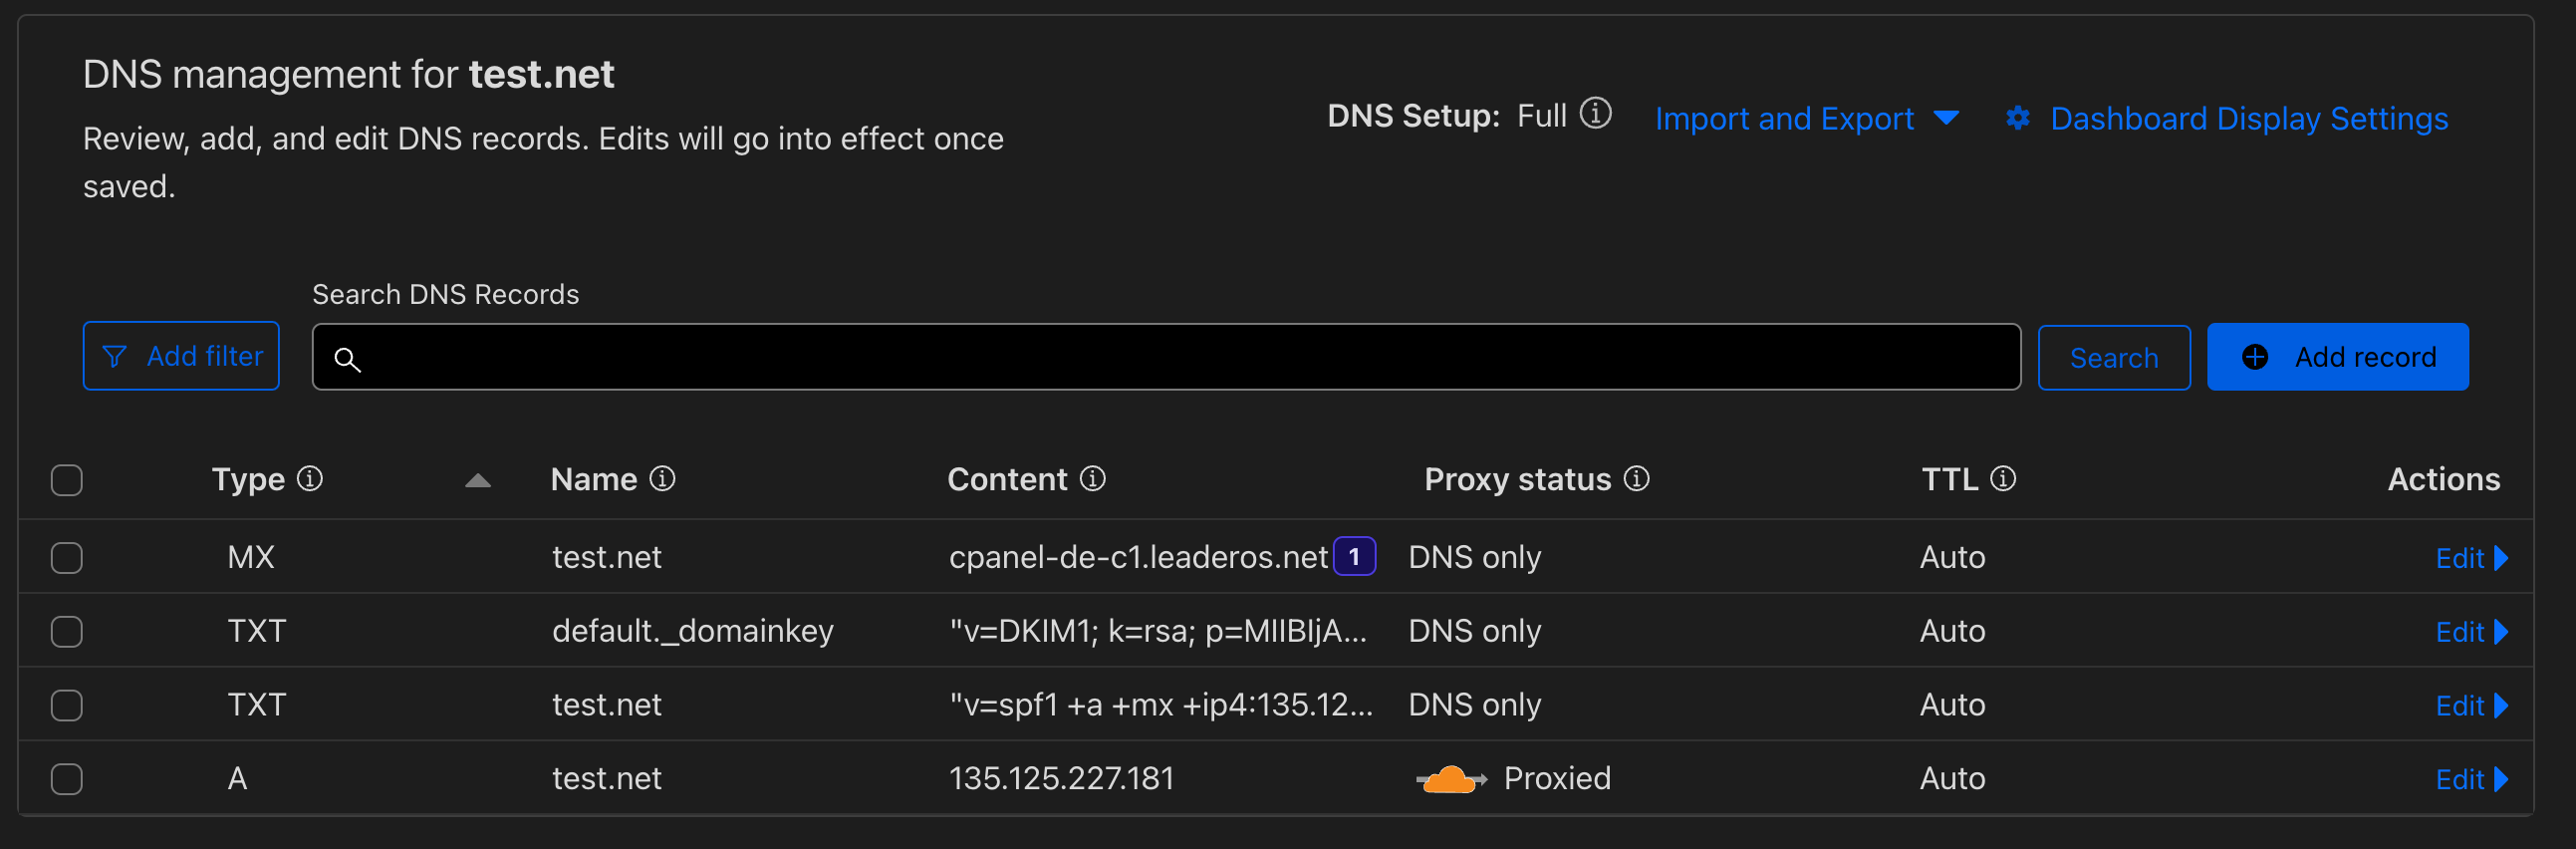
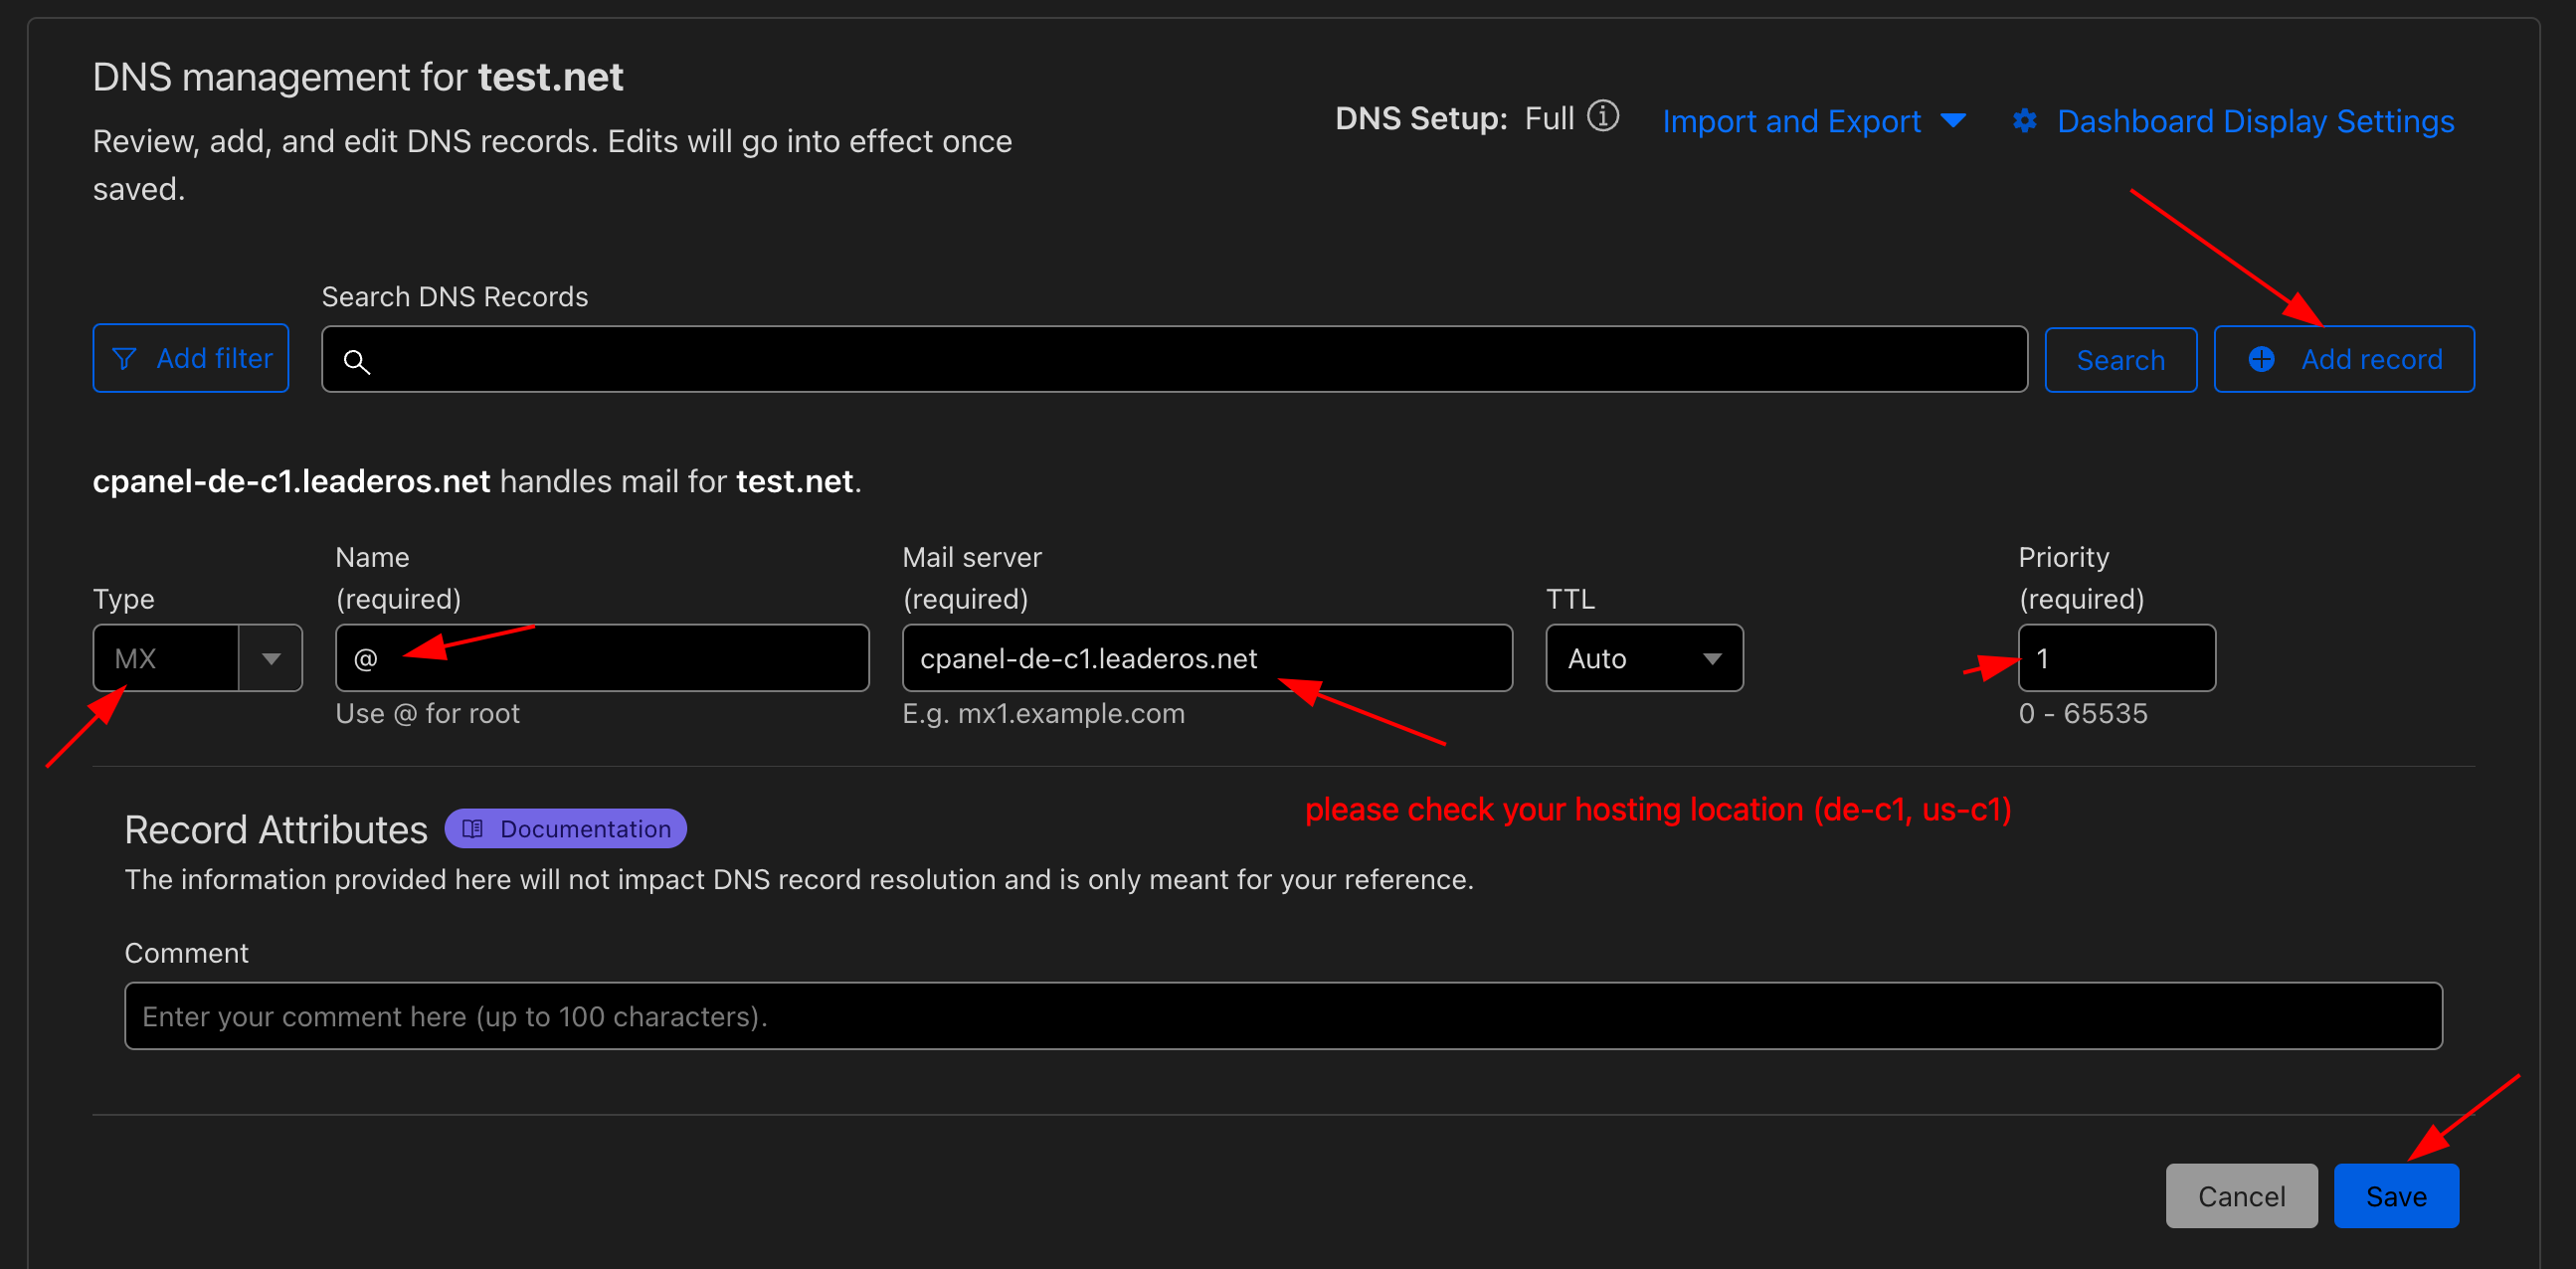
Go to Cloudflare > DNS and add SPF, DKIM and MX records by clicking on the Add Record button.
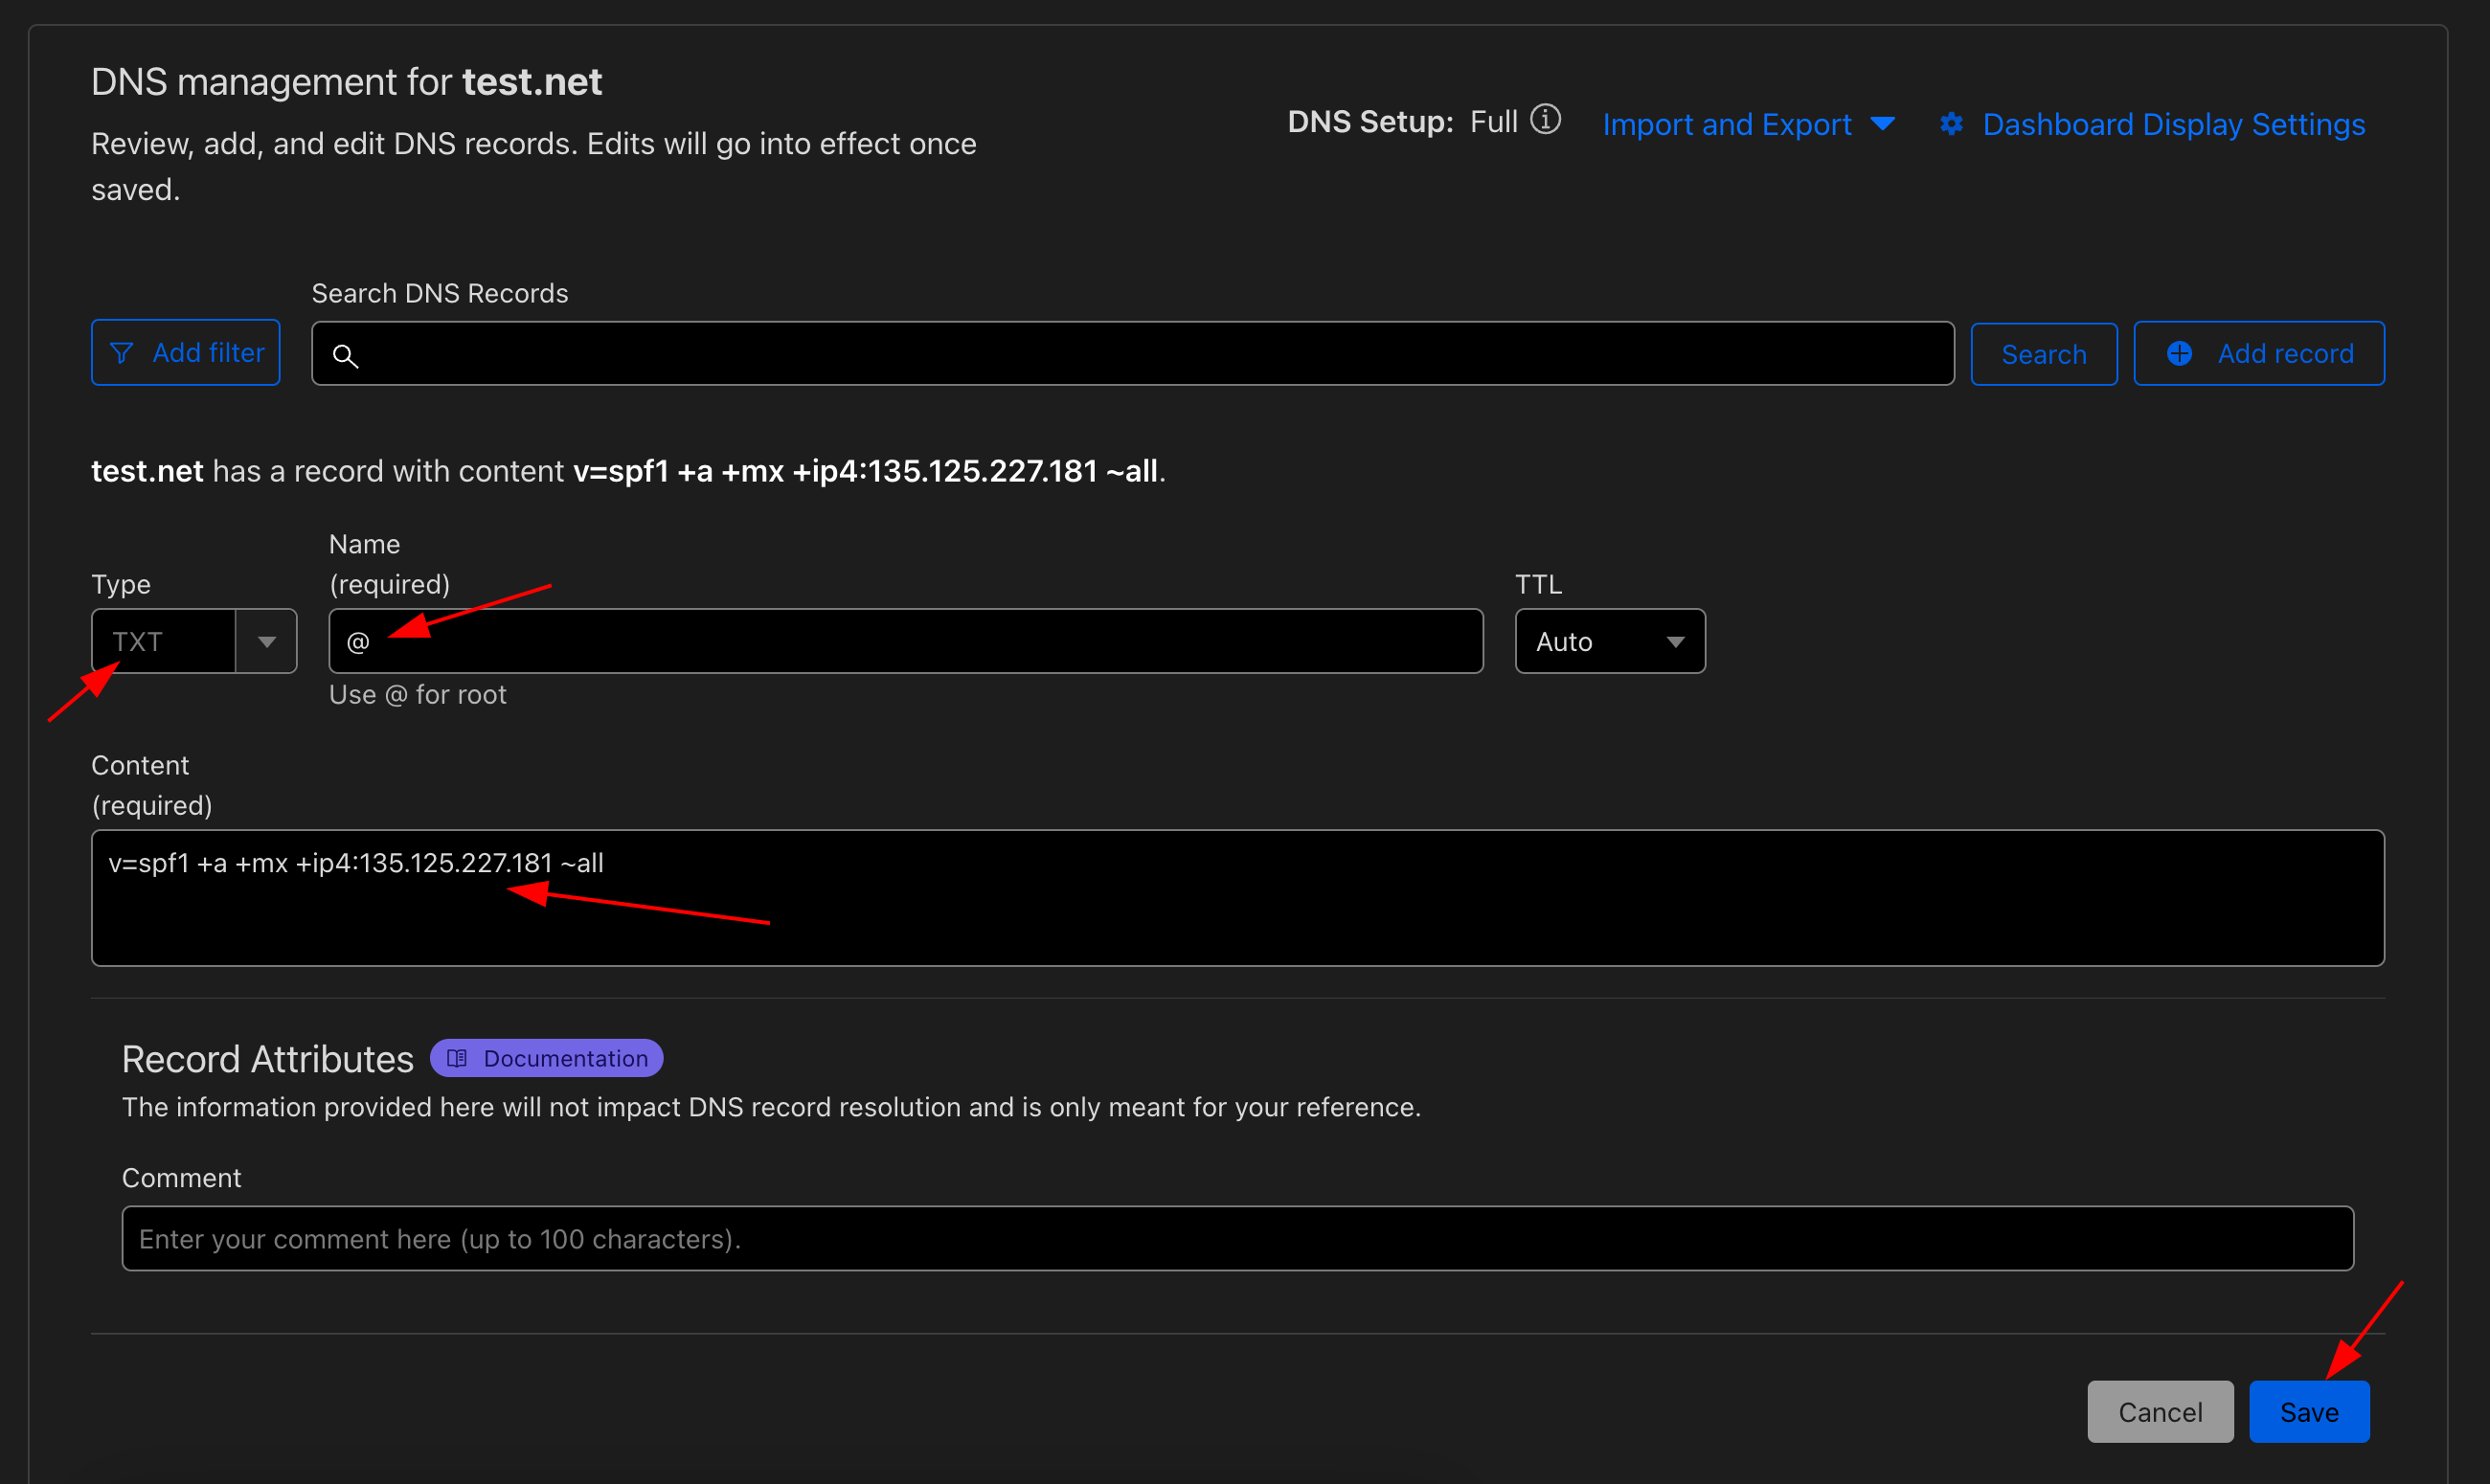
To add SPF record:
- Type: TXT
- Name: @
- Content: SPF value you copied.
- Type: TXT
- Name: default._domainkey
- Content: DKIM value you copied.

- Type: MX
- Name: @
- Content: Your cpanel hostname.
(Example cpanel-de-c1.leaderos.net)
-
Your DNS records should look like this.