Download
https://www.spigotmc.org/resources/leaderos-auth.127863/Source Code
https://github.com/leaderos-net/minecraft-leaderos-authFeatures
- Enables in-game login/register operations directly via the LeaderOS API.
- Works without a database connection. If you are experiencing database connectivity issues, this plugin is the perfect solution.
- Seamless integration with LeaderOS.
- Compatible with Velocity, Bungeecord, and Spigot/Paper.
- Provides secure and stable authentication.
- A modern alternative to AuthMe and LimboAuth.
Installation Summary
If you are using Velocity, install only the Velocity JAR.- Fill in the
urlandapi-keyfields inconfig.yml.
- Install the Spigot/Paper JAR on your Auth/Lobby server.
- Fill in the
auth-serverfield in the Bungeecordconfig.yml. - Fill in the
urlandapi-keyfields in the Spigot/Paperconfig.yml.
- Fill in the
urlandapi-keyfields inconfig.yml.
- You can set the
langvalue toento enable English language support (ortrfor Turkish). - The
urlvalue must be your website’s URL. Example:https://myserver.com - The
api-keyis the key found on your website under Dashboard > Settings > API.
Usage with Velocity
With the Velocity version, you can set up authentication without needing a dedicated “fake lobby” server. When a user joins, they are directed to a virtual Limbo server generated by the proxy for login/registration. Once authenticated, the player is redirected to the main server.Velocity Requirements
- Velocity 3.4 b520 or higher.
- LimboAPI 1.1.27.
Installation for Velocity
- Download the plugin and upload the Velocity JAR to your Velocity server’s
pluginsfolder. - Restart the Velocity server.
- Once the server restarts, open
plugins/leaderosauth/config.yml. Fill in theurlandapi-keyfields:url: Enter your website’s URL. Example:https://myserver.comapi-key: Enter your website’s API key. You can find this in Dashboard > Settings > API.
- Restart the Velocity server again to complete the installation.
Usage with Bungeecord
The Bungeecord version is designed for security. It requires a Spigot/Paper server to handle the actual login/registration process; it does not work by installing it solely on Bungeecord. The purpose of this version is to prevent users from connecting to the lobby with an admin account and executing commands like/server before logging in.
Using only the Bungeecord JAR is not enough. You must also install the plugin on a Spigot/Paper server (your auth lobby).
Installation for Bungeecord
- Download the plugin and upload the Bungeecord JAR to your Bungeecord server’s
pluginsfolder. - Restart the Bungeecord server.
- Once the server restarts, open
plugins/LeaderOS-Auth/config.ymland set theauth-serverfield to the name of the Spigot/Paper server where auth will take place (e.g.,auth_lobby). - Restart the Bungeecord server again.
- Install the Spigot/Paper version of the plugin on the server designated for authentication. Details on this installation can be found in the section below.
Usage with Spigot/Paper
You need to install this version on the server where players will log in. If you are using Bungeecord, you must install both this version (on the backend server) and the Bungeecord version (on the proxy).Installation for Spigot/Paper
- Download the plugin and upload the Spigot/Paper JAR to your server.
- Restart your server.
- Once the server restarts, open
plugins/LeaderOS-Auth/config.yml. Fill in theurlandapi-keyfields:url: Enter your website’s URL. Example:https://myserver.comapi-key: Enter your website’s API key. You can find this in Dashboard > Settings > API.send-after-auth: If you want to redirect the player to a different server after a successful login/register, set this totrueand specify theservername. Example:lobby
config.yml
Velocity
Bungeecord
Spigot/Paper
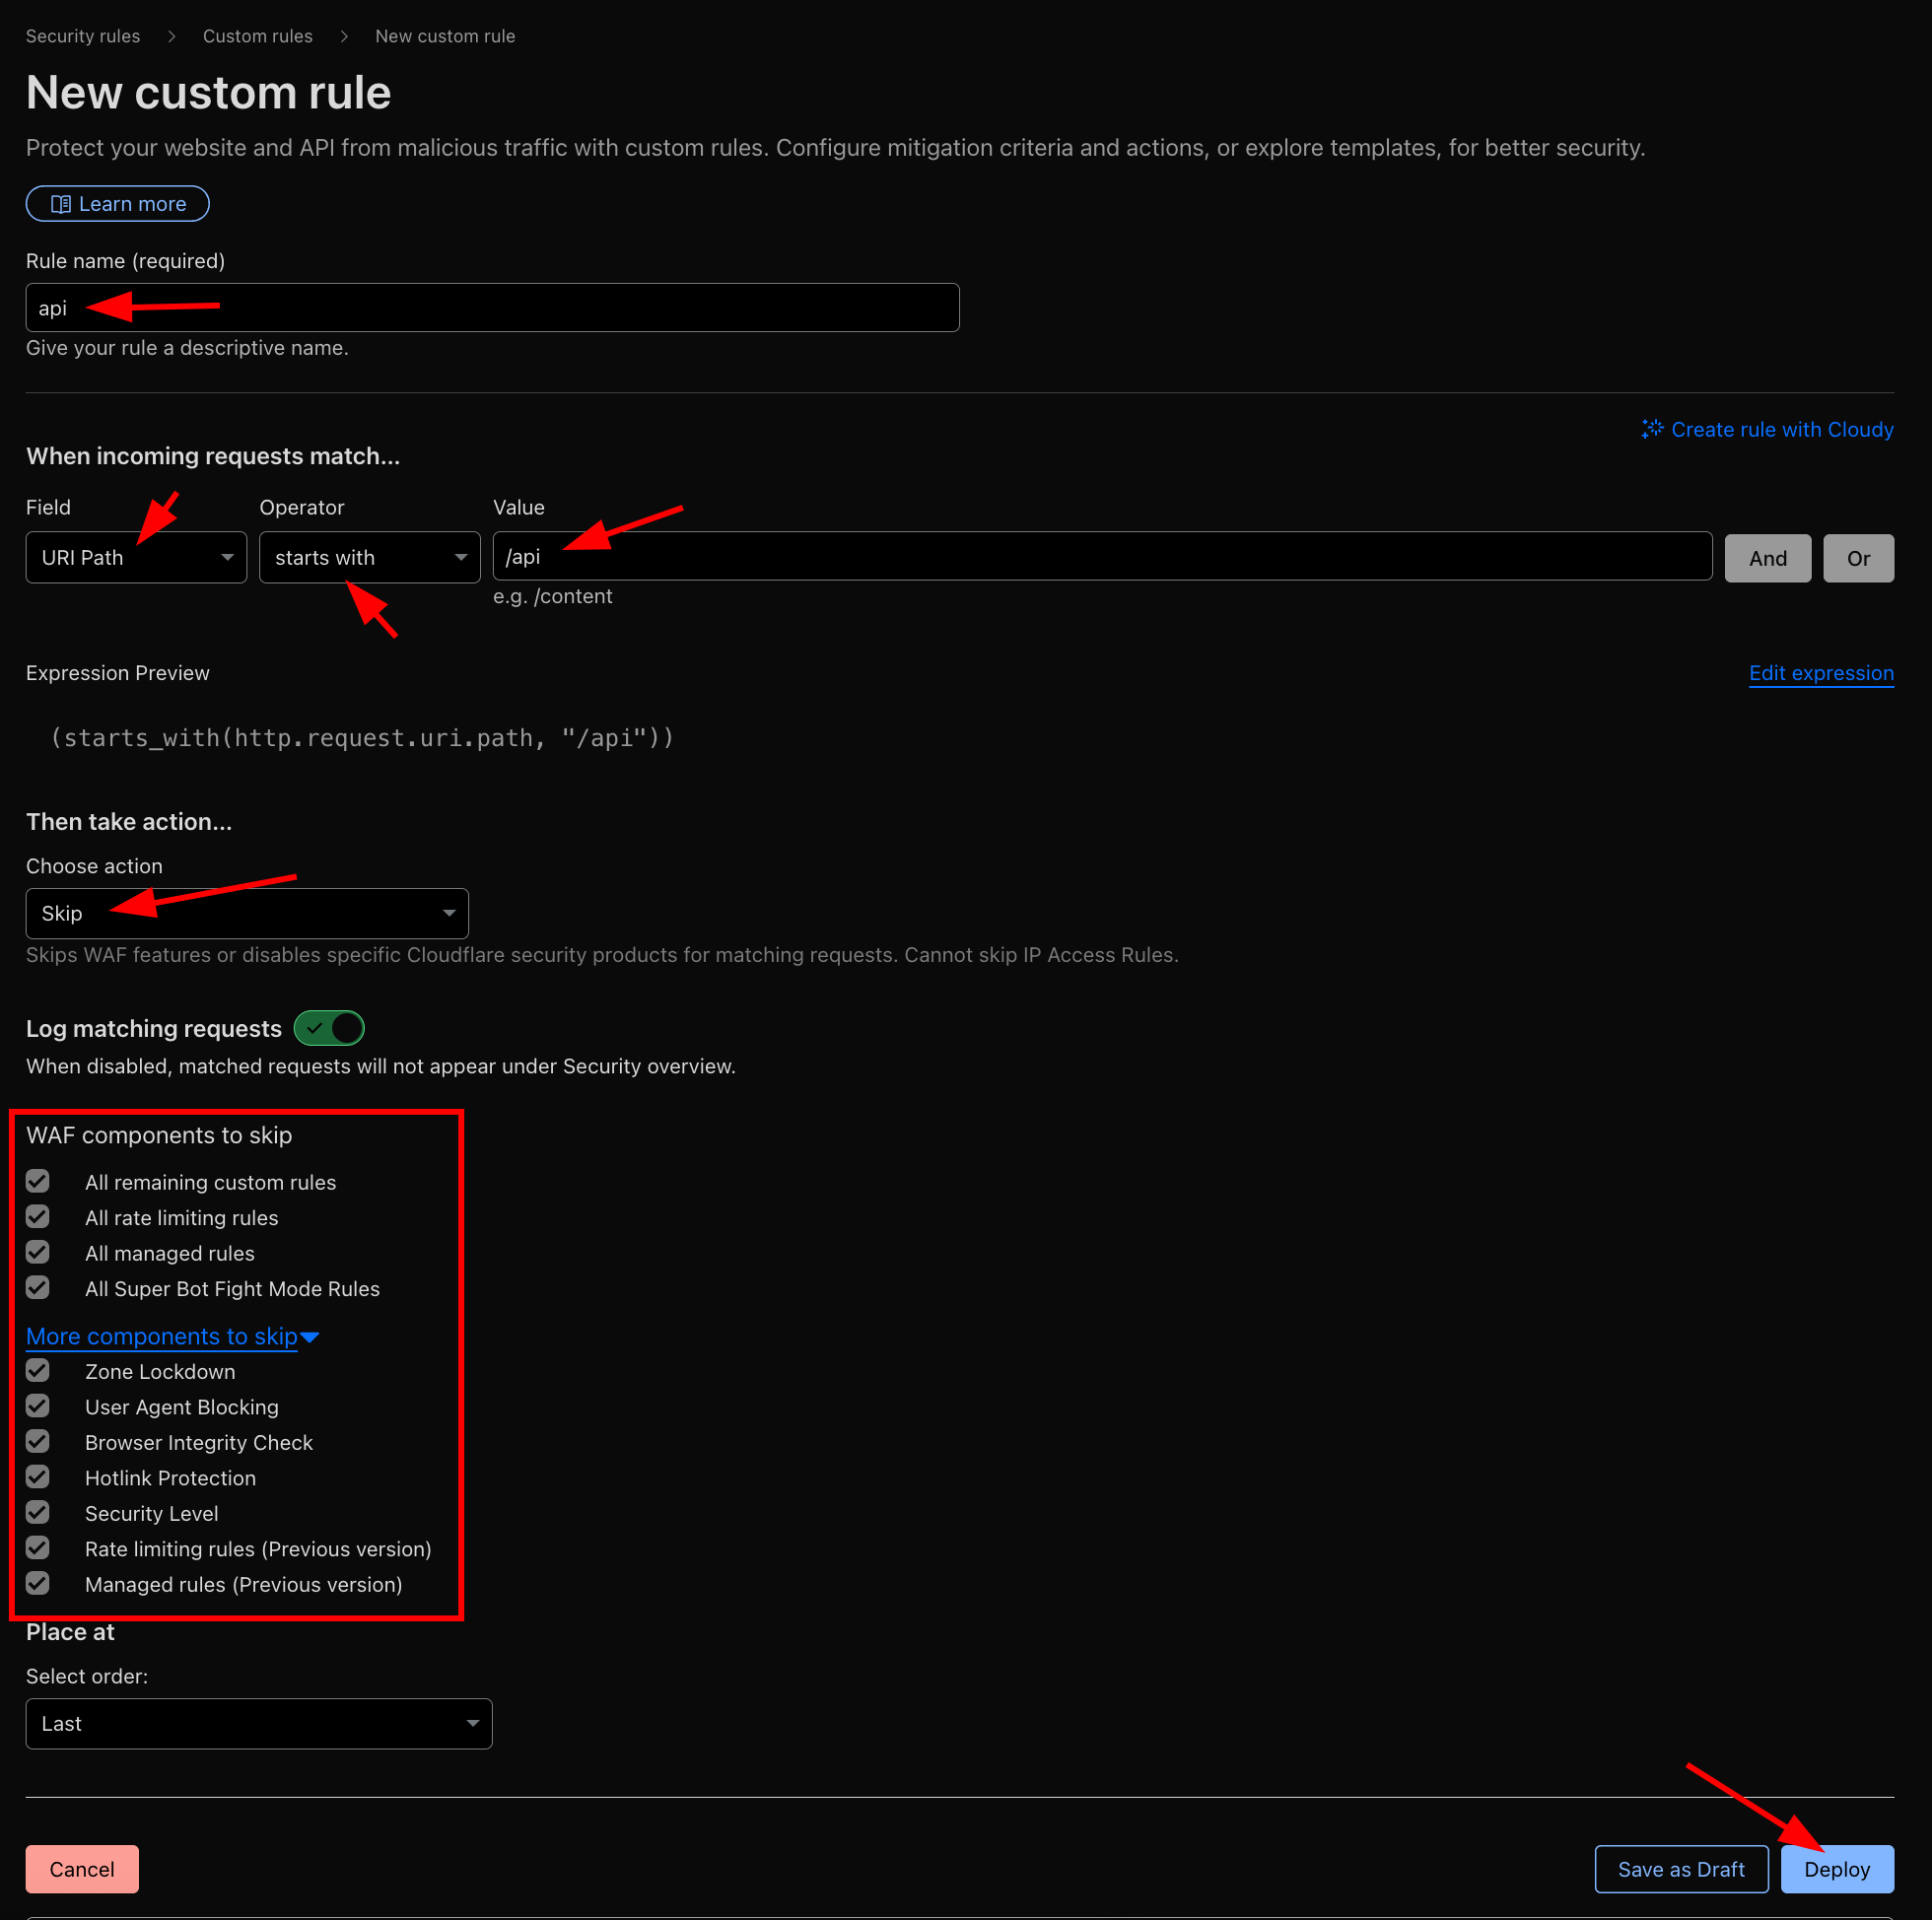
Unblocking API for sites using Cloudflare
If you are using Cloudflare, it may block your API system and prevent player logins. In this case, follow the steps below to whitelist the API system in Cloudflare:- Log in to your Cloudflare dashboard.
- Navigate to Cloudflare > Security > Security Rules (WAF) > Create Rule > Custom Rules.
- Create a rule that matches the configuration shown in the image below.