How to create a support category?
Go to Dashboard > Support & Help > Tickets > Categories > Add New. You can add a category by providing the following information:- Name: The name of the category.
-
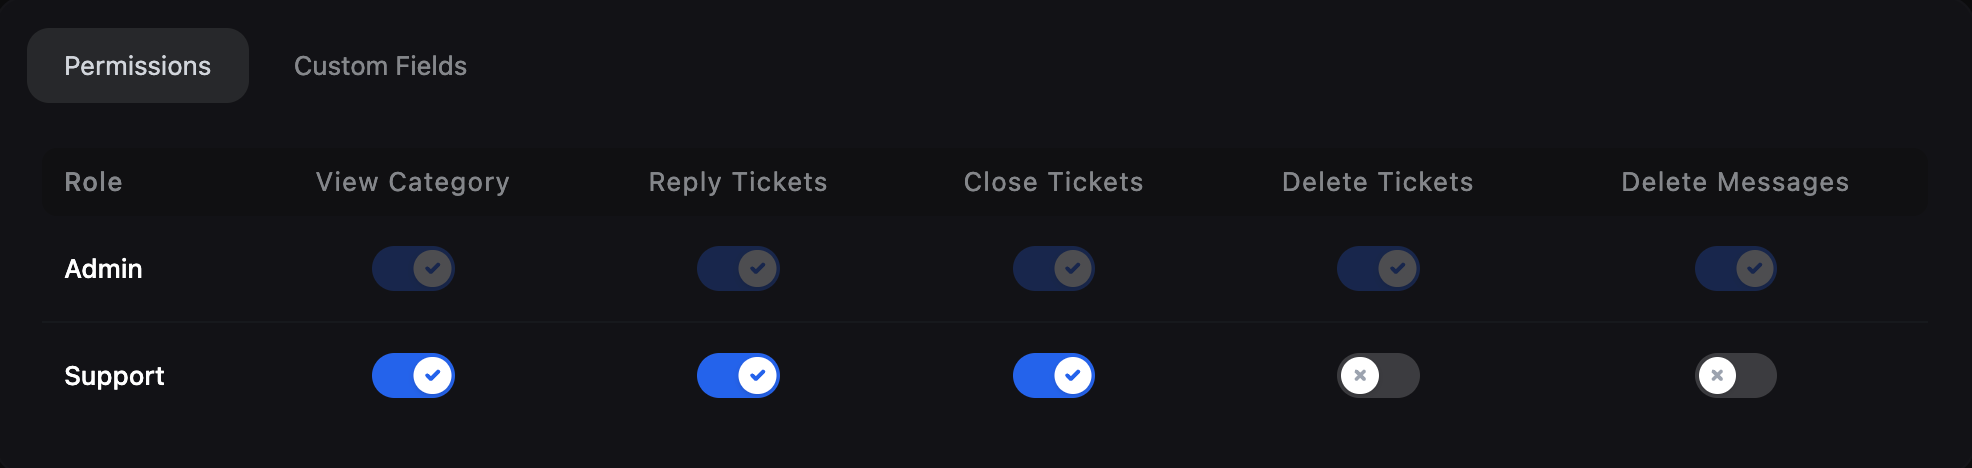
Permissions Tab: You can select the roles that can view and manage tickets of this category.
- Only roles with “Manage Support Tickets” permission can be edited in the permission table.
- You can also see the roles with “Super Admin” and “Manage Support” permissions in this table, but you cannot edit the permissions of the roles with these permissions.
- You cannot see roles in this table except roles with “Super Admin”, “Manage Support” and “Manage Support Tickets” permissions.
- Users with the “Manage Support Tickets” permission that you define for the user will automatically have all category-specific permissions.
- When you add a new role with “Manage Support Tickets” permission, it will not have category-specific permissions. Therefore, you will need to edit this category again for each new role you add.
-
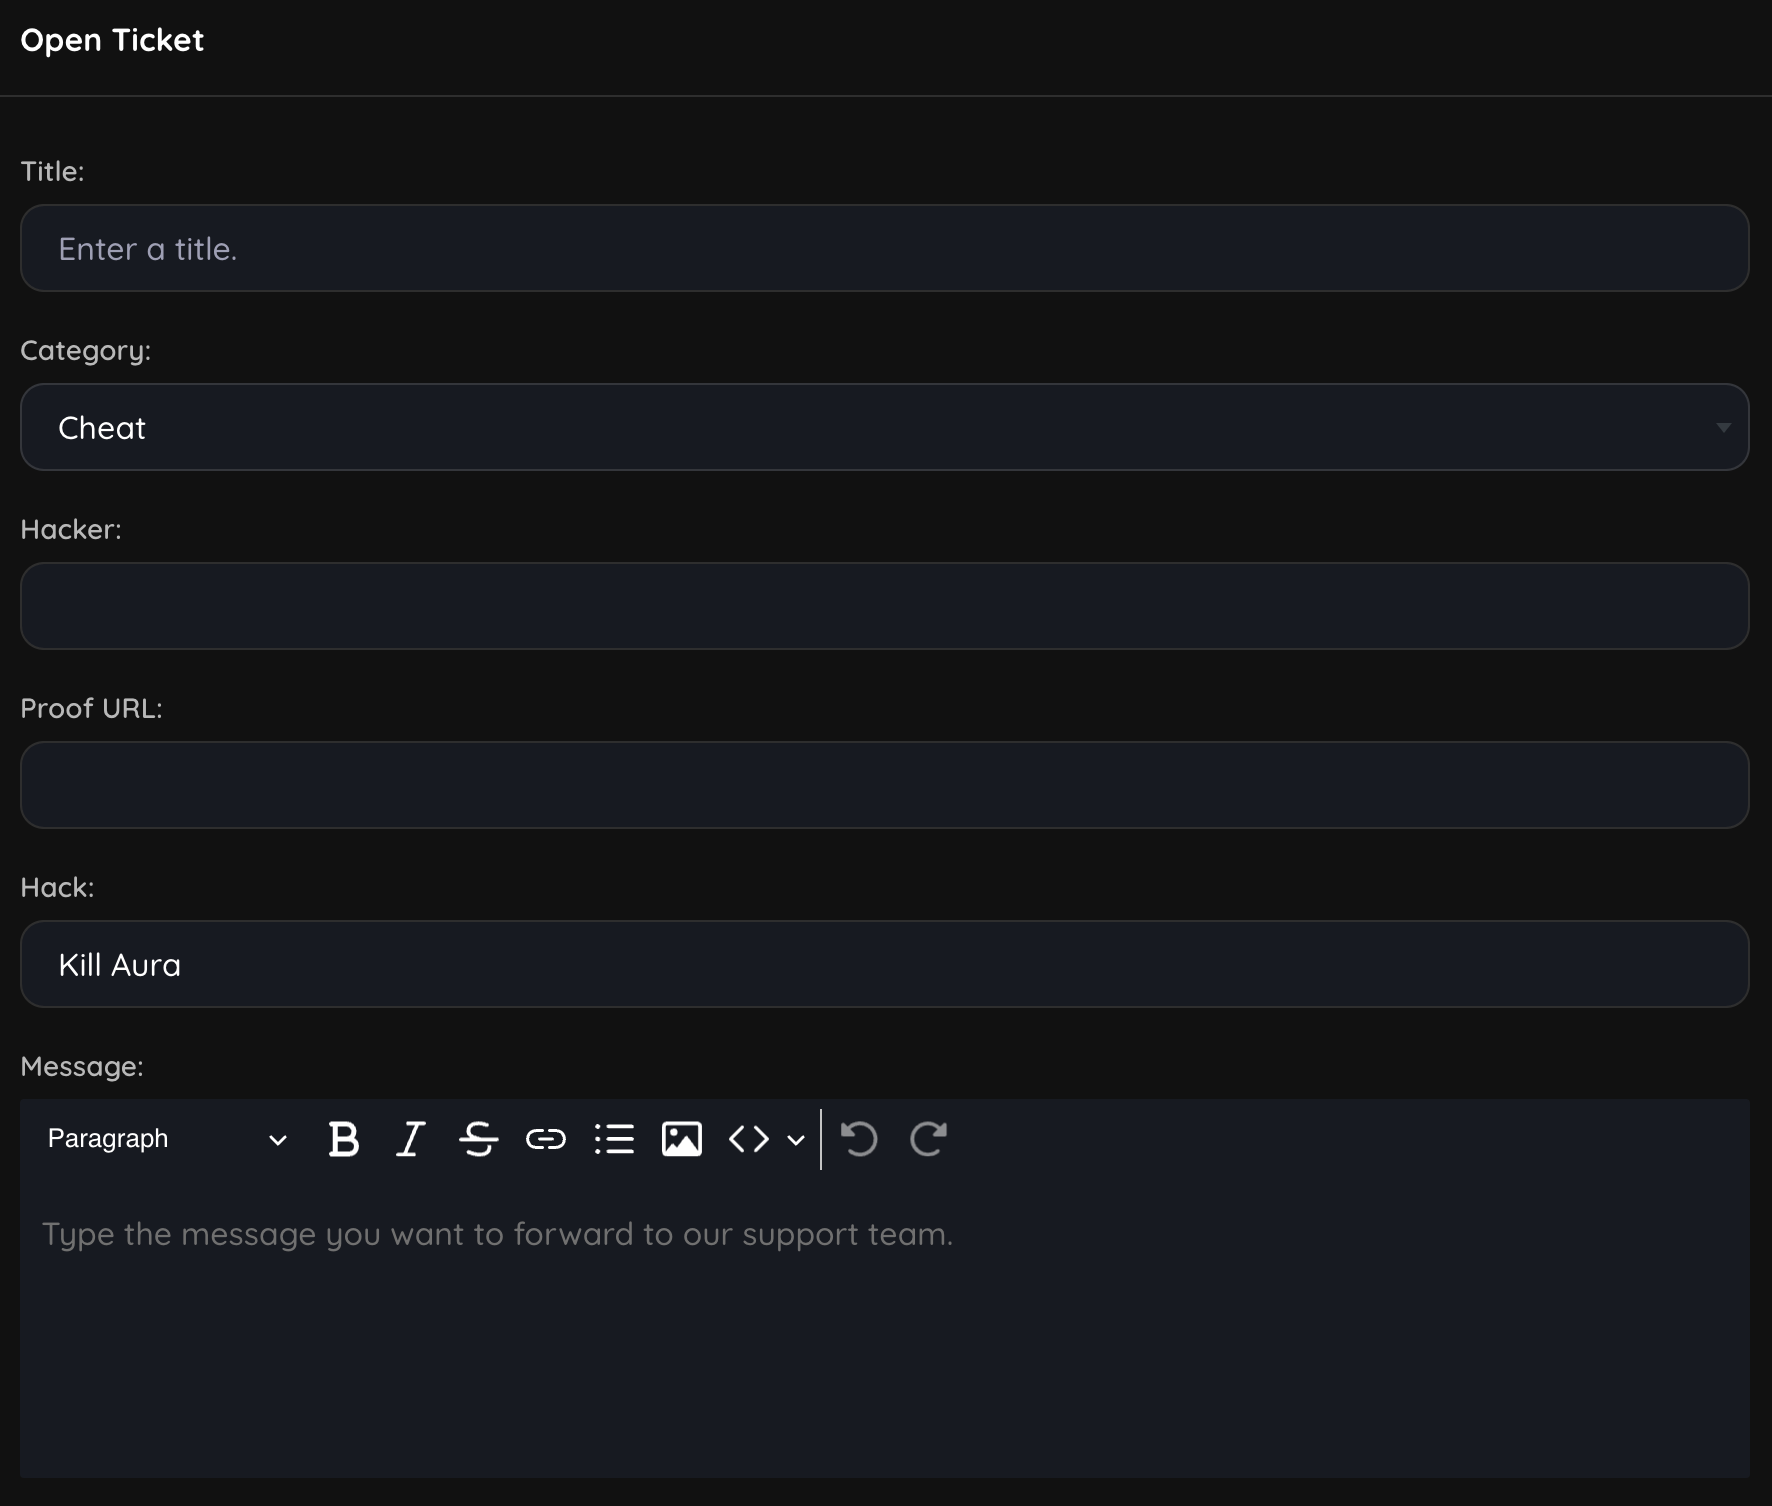
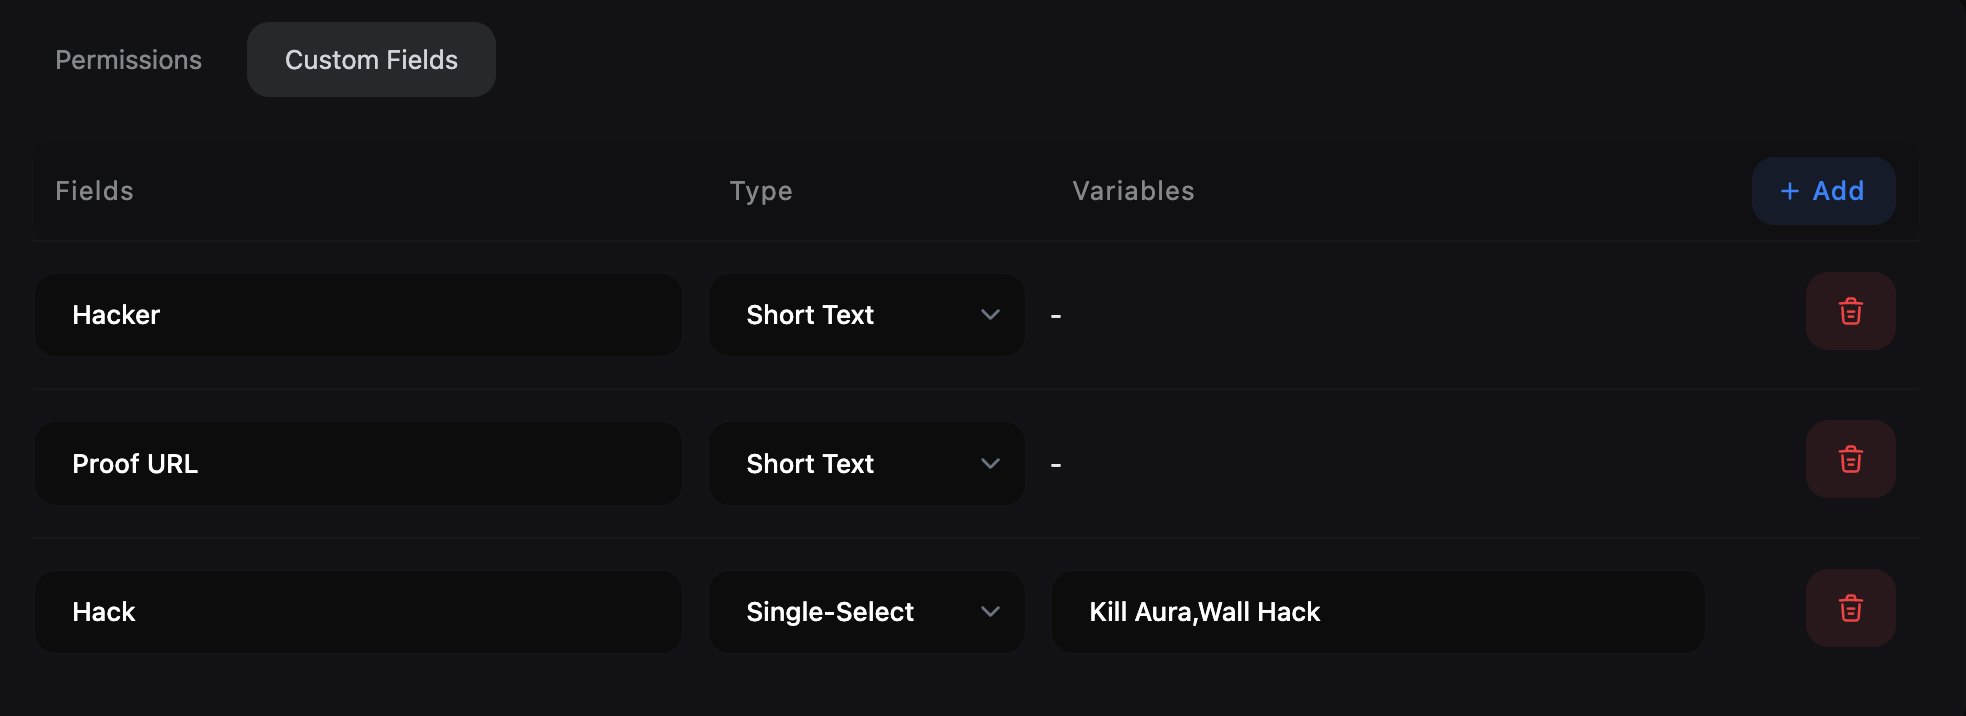
Custom Fields Tab: You can add multiple custom fields that are specific to this category by clicking on the “Add” button. These fields will be displayed when a user selects this category while submitting a ticket.
- Field Label: The label of the custom field.
- Field Type: The type of the custom field. It can be a short text, long text, single select, multi-select.
- Short Text: A single line text field.
- Long Text: A multi-line text field.
- Single Select: A dropdown field where users can select only one option. You can add multiple options separated by a comma.
- Multi-Select: A dropdown field where users can select multiple options. You can add multiple options separated by a comma.
How do custom fields work?
When a user selects a category while submitting a ticket, the custom fields of that category will be displayed on the ticket submission form. The user will have to fill in these fields to submit the ticket.