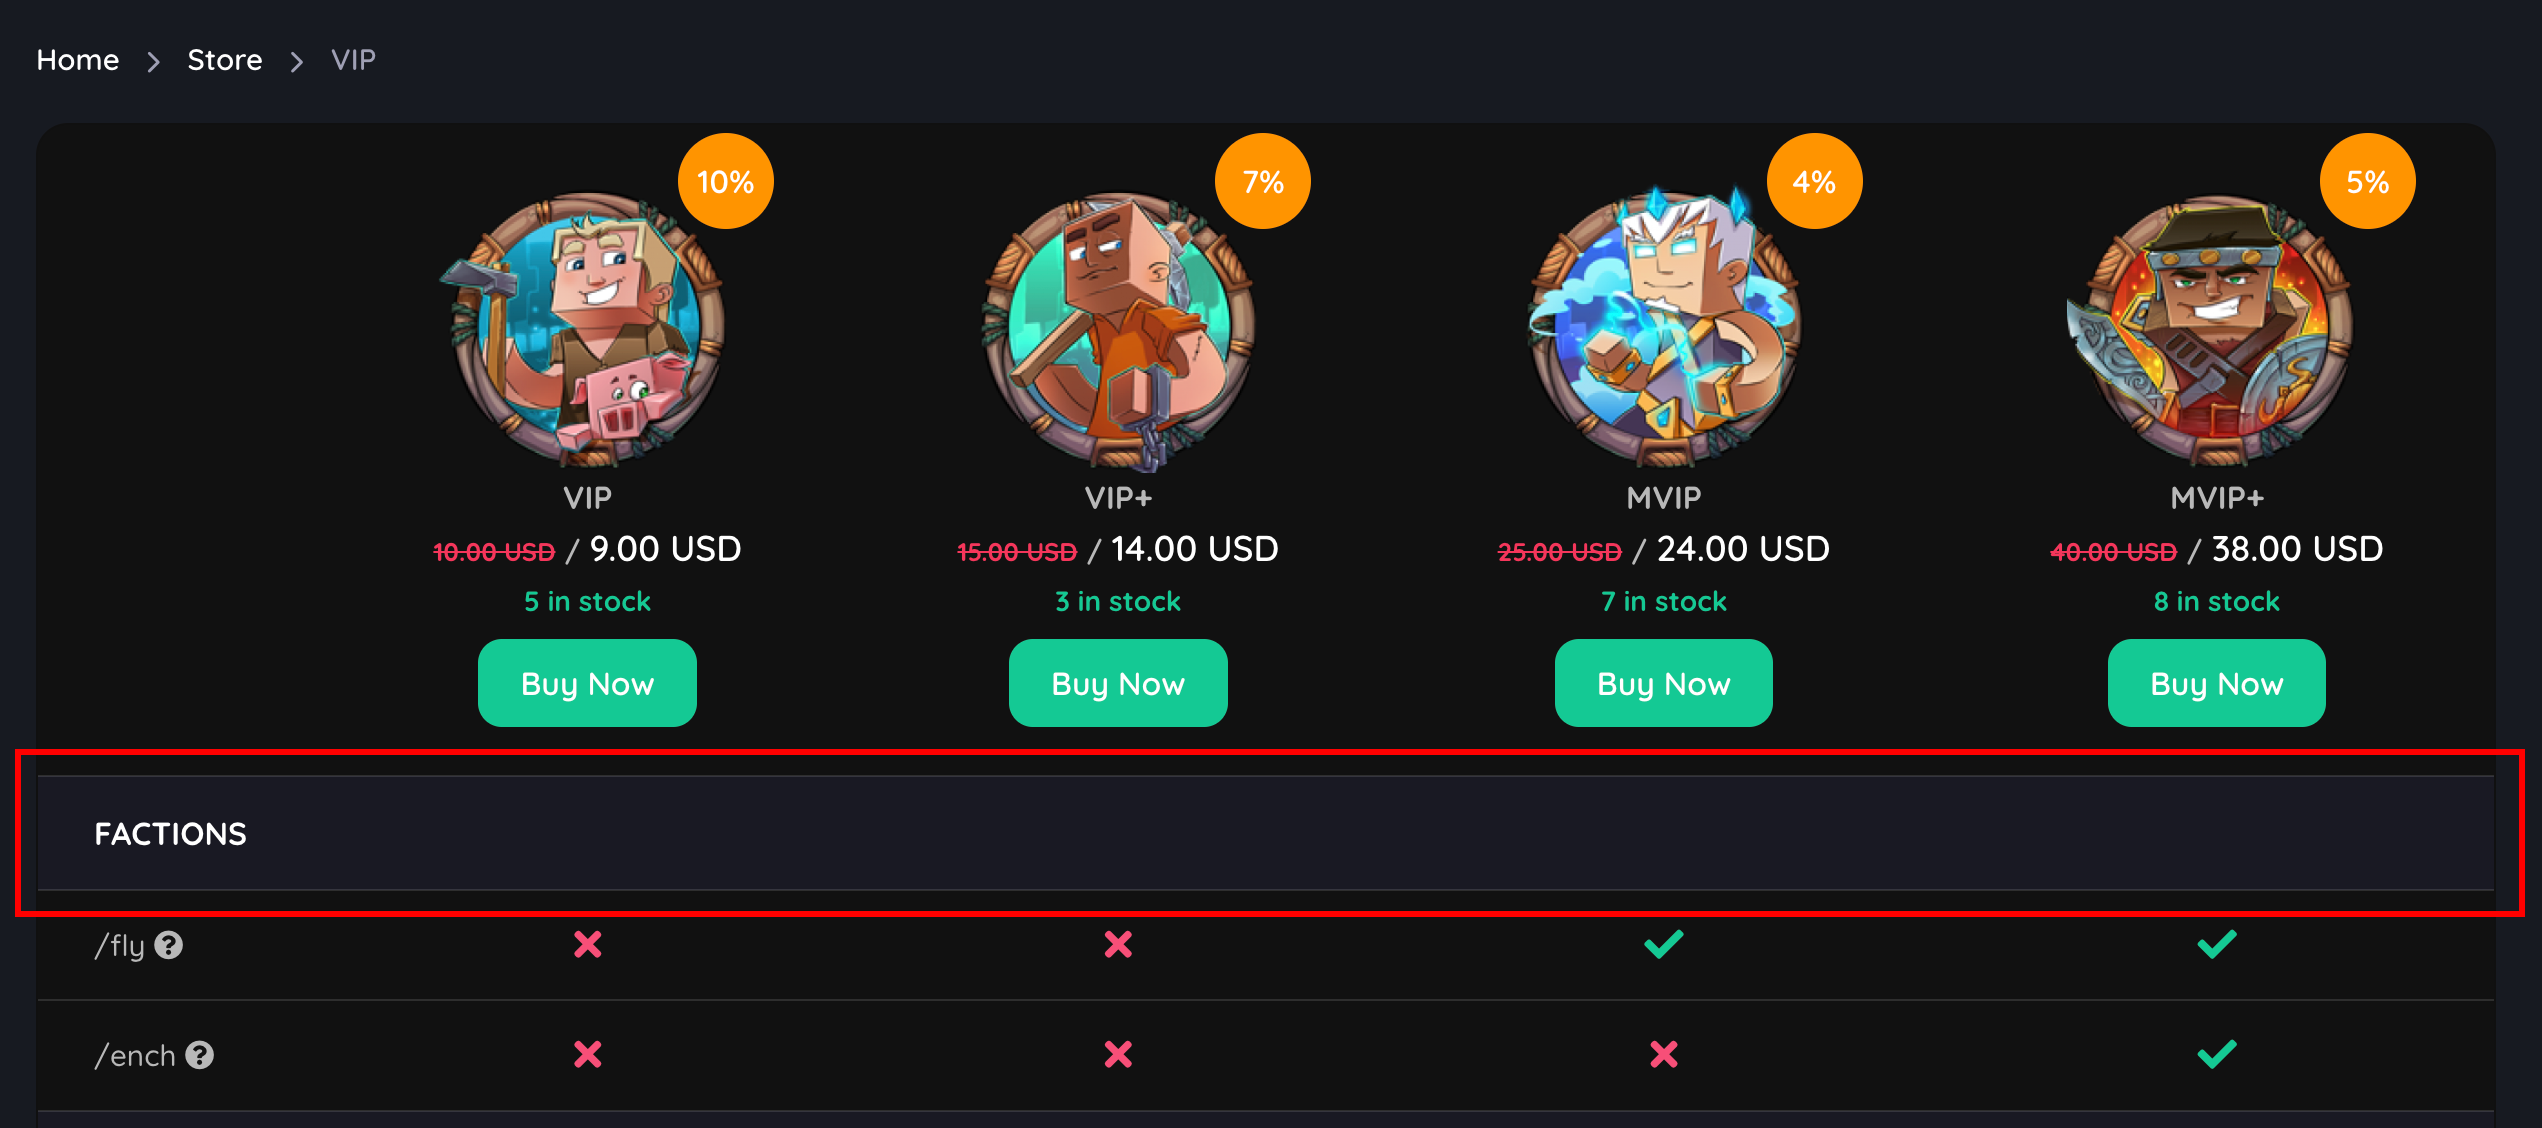
How to create a VIP Table?
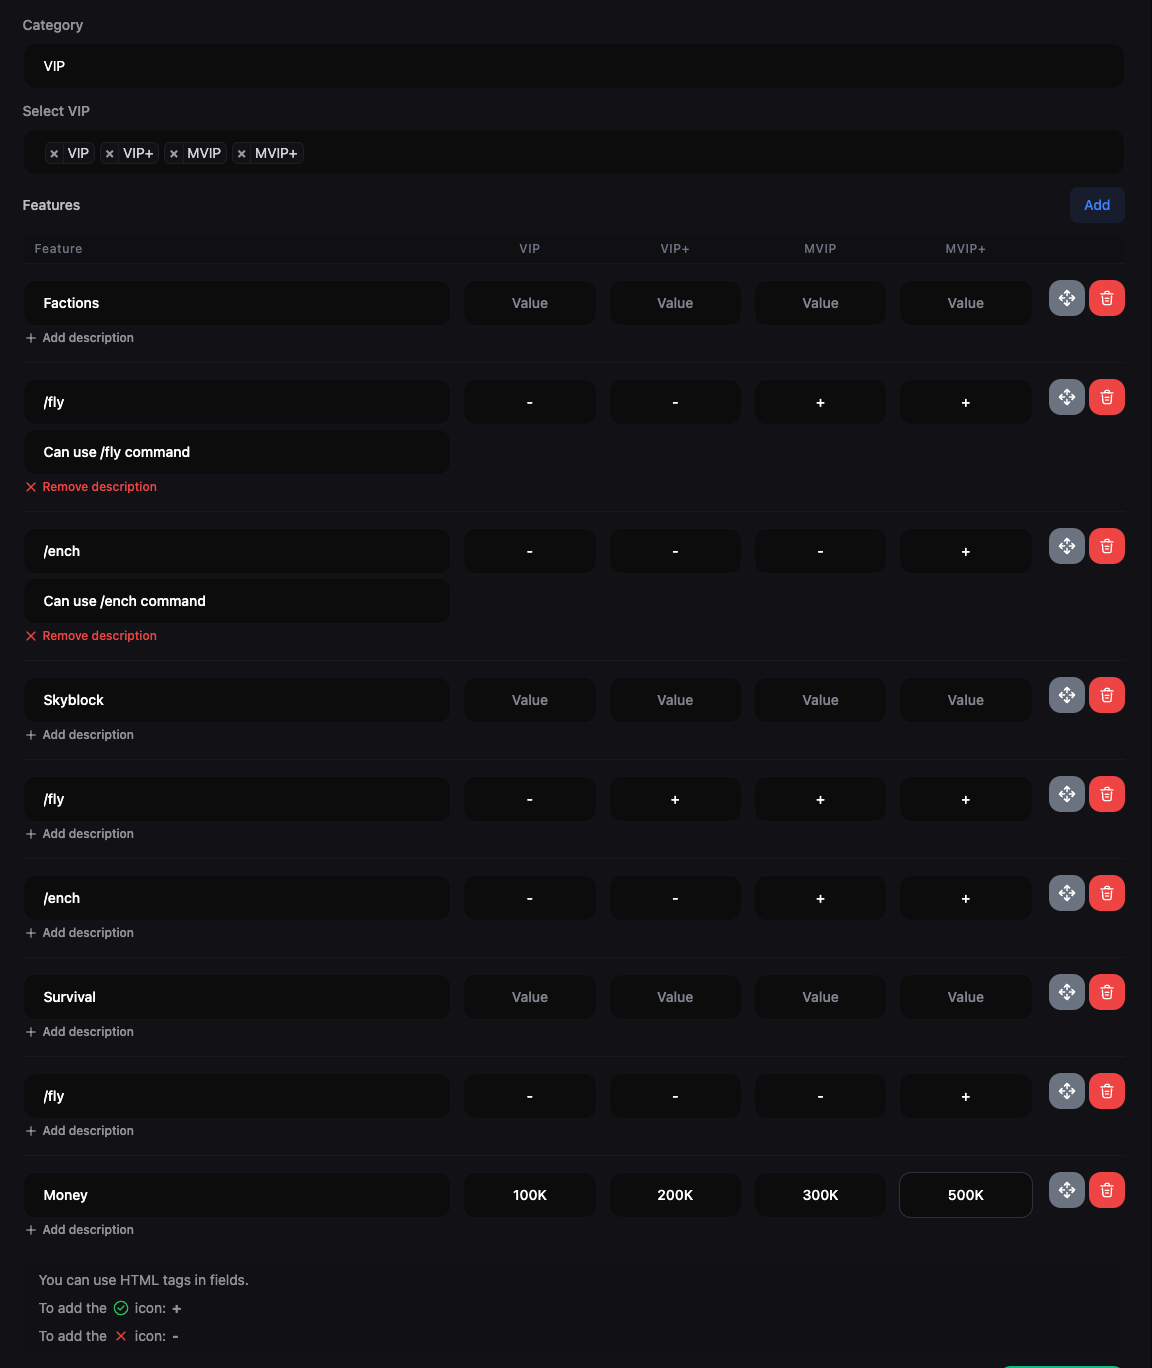
To begin, create a category and VIP products in your store. If you have not yet created a VIP product, follow the steps here. After creating the VIP products, go to Dashboard > Store > VIP Tables > Add New. You can add a VIP table by providing the following information:- Category: Choose a category to create a VIP table for. The VIP table will be featured on the store page of the selected category.
- Products: Select the VIP products that you want to compare in the table. You can select only the VIP products that belong to the selected category.
- Features: Add the features that you want to compare in the table. You can add multiple features by clicking on the Add button. You can also move the features up and down by dragging the Move icon. To remove a feature, click on the Remove icon.
- Feature: Enter the feature that you want to compare. You can add descriptions for each feature by clicking on the + Add Description button.
- Value: Enter the value of the feature for each VIP product. You can use HTML tags in fields. To add check icon, use ”+” and for cross icon, use ”-”.

How to add separator columns?
To add separator columns, leave the feature’s values empty.