
What is the Variable Feature?
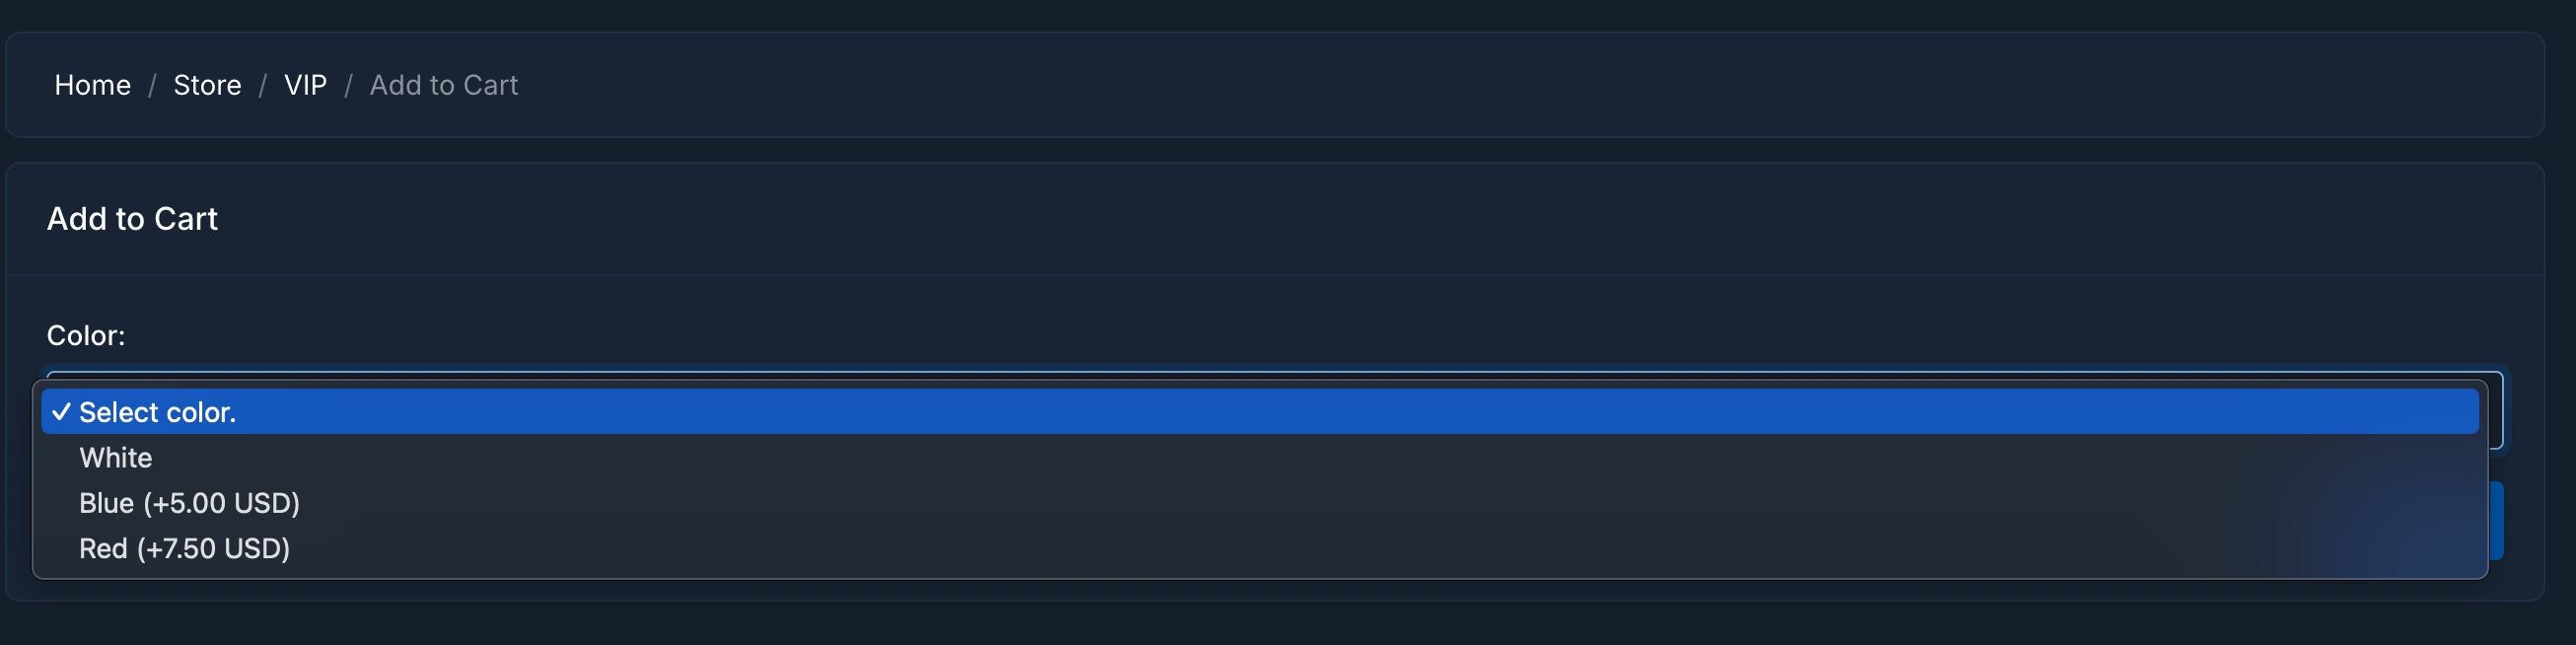
The variable feature allows you to create custom fields for your products, enabling you to gather additional information from customers during the purchasing process. These variables are presented to the customer when they add the product to their cart and are used to customize the order. For instance, if you create a VIP product and add a variable called “Color,” customers will be prompted to select their preferred color when purchasing the product. If certain colors have additional charges, those fees are automatically added to the total cart price. The%color% variable in server commands is then dynamically replaced with the customer’s selected color.
In the example images below, a variable named “Color” was created and assigned to the VIP product. The “White” option is free, while “Blue” and “Red” have additional costs. Once the purchase is finalized, the %color% variable in the server command is replaced with the selected color value.
How to create a variable?
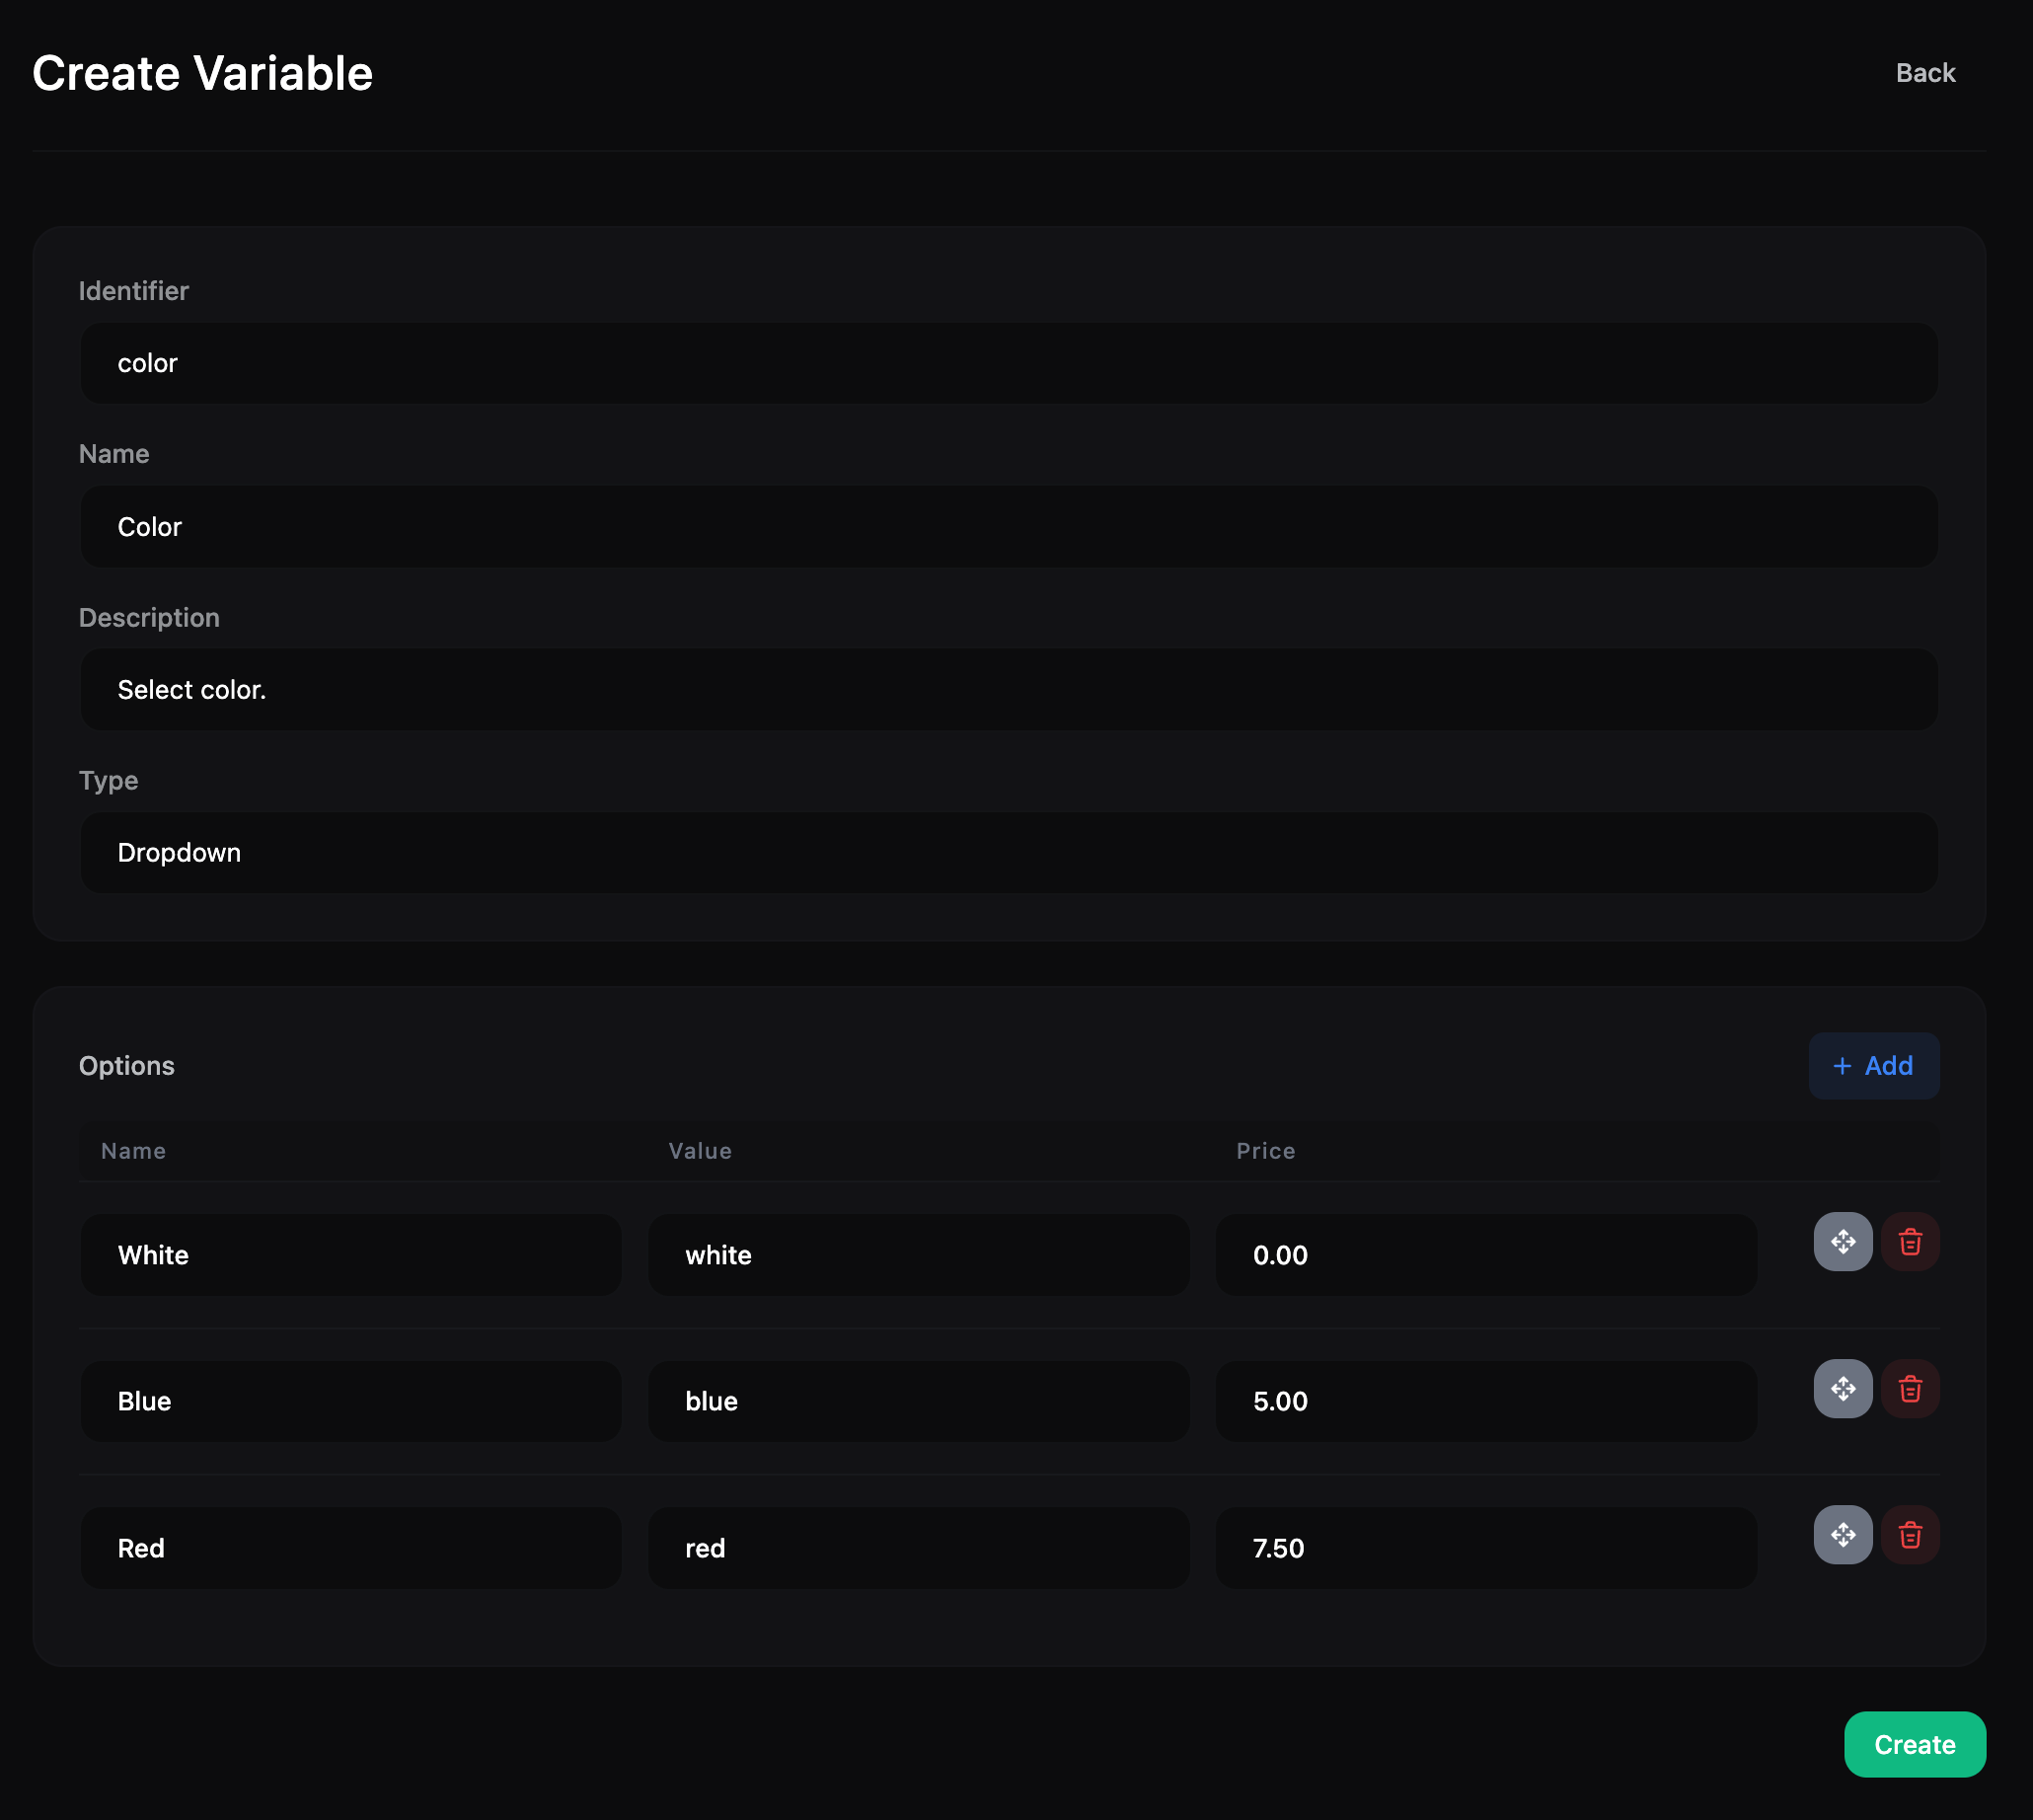
Navigate to Dashboard > Store > Variables > Add New. You can add a new variable by providing the following details:- Identifier: Assign a unique identifier for the variable. You can use this identifier in product commands later, e.g.,
%color%. - Name: Enter the name of the variable. This will be displayed to the user.
- Description: Provide a description explaining the purpose of the variable.
- Type: Select the type of variable. Options are Text, Number, or Dropdown.
- Text: Prompt the user to enter a text value.
- Number: Prompt the user to enter a numeric value.
- Dropdown: Present the user with a list of predefined options.
- Options: If the type is Dropdown, define the options here.
- Name: Enter the name of the option.
- Value: Enter the value for the option. This value is used in product commands. For example, if you set the value to
red, the%color%variable in product commands will be processed asred. A command likesay Color: %color%will be sent to the server assay Color: red. - Price: Enter the price of the option. This price is added to the product’s base price. For instance, if the VIP product costs $10 and the “Red” color option adds $5, the total price in the cart will be $15.
- Options: If the type is Dropdown, define the options here.
How to assign a variable to a product?
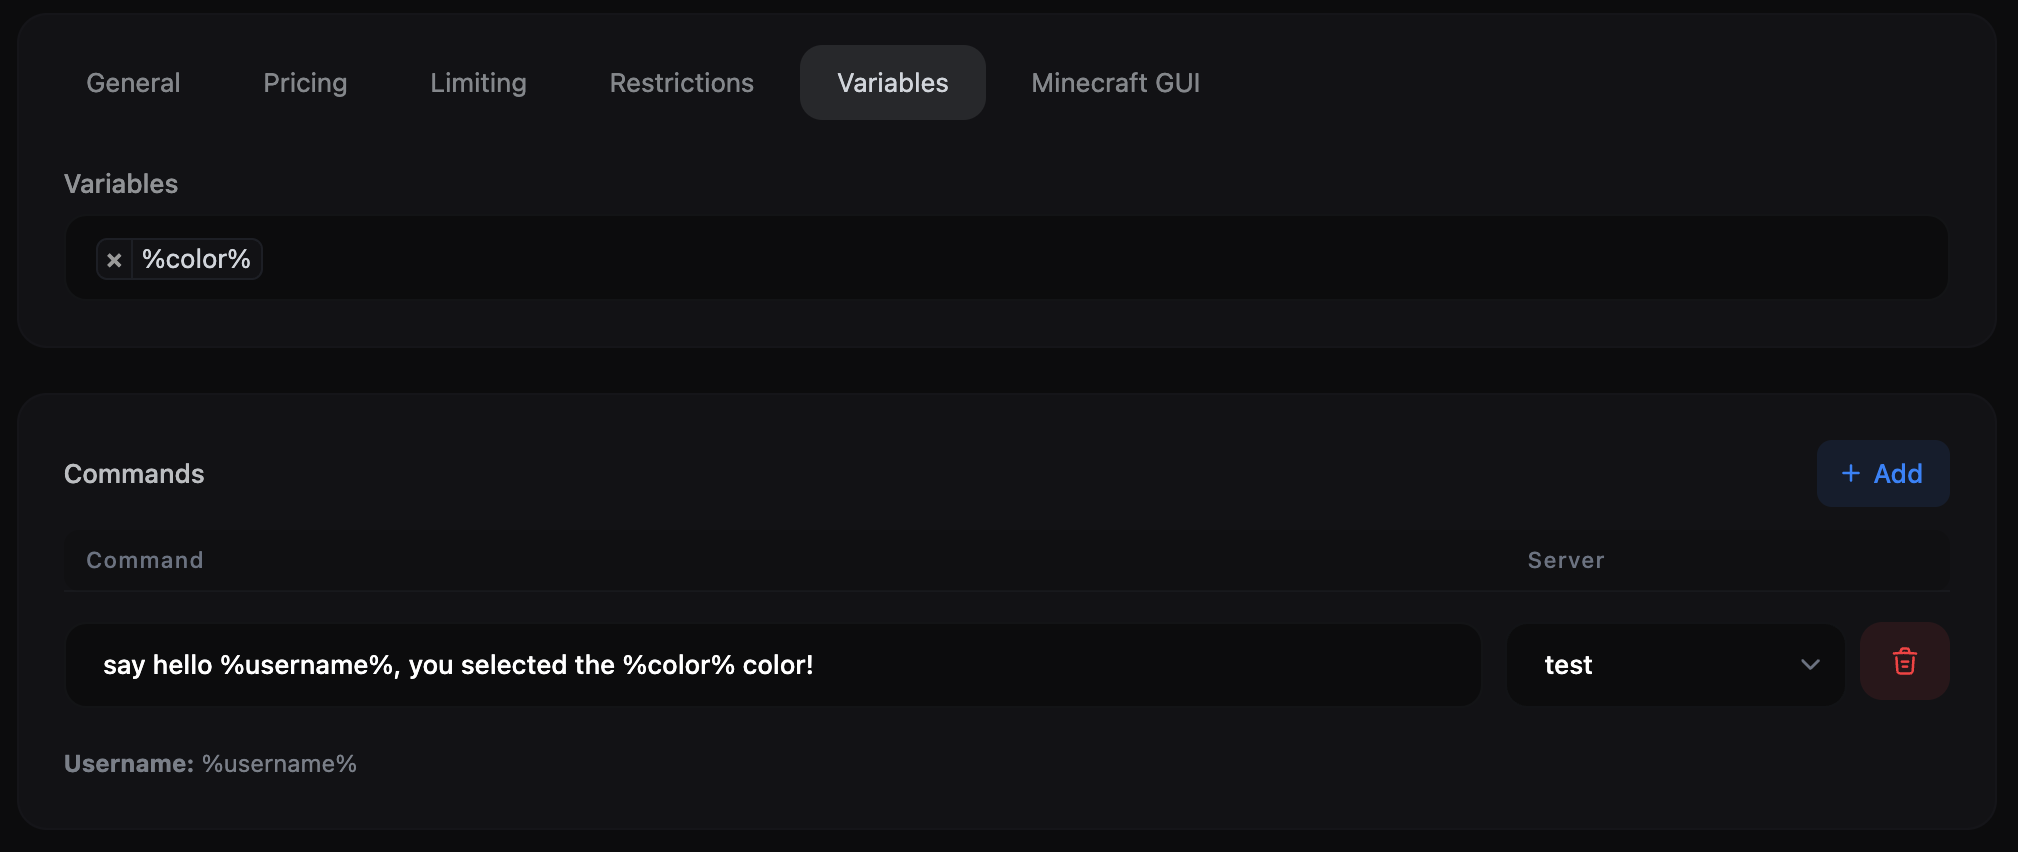
Navigate to Dashboard > Store > Products > Edit Product. In the product editing page, click on the Variables tab. On the opened page, click the Add Variable button to assign a variable. The assigned variables will be requested from the user when they add the product to their cart, and the order will be processed accordingly.How to use a variable’s value in commands?
In the commands section of the product editing page, use variables in the format%identifier%. For example, if you created a variable with the identifier color, you can use it in commands as %color%. The variable in the command will be replaced with the value entered by the user and sent to the server.
say hello LeaderOS, you selected the red color!